mybatis源码详解
1、什么是mybatis
Mybatis是一个开源、轻量级的数据持久化框架,是 JDBC 和 Hibernate 的替代方案。MyBatis内部封装了 JDBC,简化了加载驱动、创建连接、创建 statement 等繁杂的过程,开发者只需要关注 SQL 语句本身。
2、mybatis项目搭建
项目的搭建我们可以参照官方文档,该项目基于mybatis-3.5.10,不加入Spring整合。参考文档,我们只需要创建mybatis核心配置文件mybatis-config.xml,mapper.xml以及对应的mapper接口。
1、mybatis-config.xml (使用外部属性文件配置数据源)
<?xml version="1.0" encoding="UTF-8" ?>
<!DOCTYPE configuration
        PUBLIC "-//mybatis.org//DTD Config 3.0//EN"
        "http://mybatis.org/dtd/mybatis-3-config.dtd">
<configuration>
	<!-- 引入数据连接参数属性文件 -->
	<!-- <properties resource="mysqldb.properties"/> -->
	<properties resource="oracledb.properties"/>
    <!--设置日志-->
    <settings>
        <setting name="logImpl" value="STDOUT_LOGGING"/>
    </settings>
    <!--类型别名:用于写sql文件中入参类型和返回类型的指定  -->
    <typeAliases>
      <package name="com.cssl.pojo"/>
    </typeAliases>
    <environments default="development">
        <environment id="development">
            <transactionManager type="JDBC"/>
            <!--配置数据源,创建Connection连接对象-->
            <dataSource type="POOLED">
                <!--driver:驱动的内容-->
                <property name="driver" value="${driver}"/>
                <!--url:连接数据库的url-->
                <property name="url" value="${url}"/>
                <!--用户名-->
                <property name="username" value="${username}"/>
                <!--密码-->
                <property name="password" value="${password}"/>
            </dataSource>
        </environment>
    </environments>
    <mappers>
        <!--
            指定mapper文件的路径
        -->
        <!-- <mapper resource="com/cssl/mapper/EmpMapper.xml"/> -->
        <package name="com.cssl.mapper"/>
    </mappers>
</configuration>
2、mapper接口
package com.cssl.mapper;

import java.util.List;
import java.util.Map;

import org.apache.ibatis.annotations.Mapper;
import org.apache.ibatis.annotations.Param;
import org.junit.jupiter.params.ParameterizedTest;

import com.cssl.pojo.Emp;

public interface EmpMapper {
	public List<Emp> getAllEmp();

	public List<Emp> getByName(Map<String, String> map);

	public Emp getEmpById(@Param("no") Integer empno);
}
3、mapper.xml文件
<?xml version="1.0" encoding="UTF-8" ?>
<!DOCTYPE mapper
        PUBLIC "-//mybatis.org//DTD Mapper 3.0//EN"
        "http://mybatis.org/dtd/mybatis-3-mapper.dtd">
<mapper namespace="com.cssl.mapper.EmpMapper">
	<select id="getAllEmp" resultType="com.cssl.pojo.Emp">
		select empno,ename as name,job,mgr,hiredate,sal,comm,deptno from emp
	</select>

   <select id="getByName" parameterType="java.util.Map" resultType="com.cssl.pojo.Emp">
        select empno,ename as name,job,mgr,hiredate,sal,comm,deptno from Emp where ename=#{ename}
    </select>

    <select id="getEmpById" parameterType="java.lang.Integer" resultType="Emp">
        select empno,ename as name,job,mgr,hiredate,sal,comm,deptno from Emp where empno=#{no}
    </select>
</mapper>
4、创建Junit测试类
package com.cssl.test;

import java.io.IOException;
import java.io.InputStream;
import java.util.Date;
import java.util.HashMap;
import java.util.Map;

import org.apache.ibatis.io.Resources;
import org.apache.ibatis.session.SqlSession;
import org.apache.ibatis.session.SqlSessionFactory;
import org.apache.ibatis.session.SqlSessionFactoryBuilder;
import org.junit.After;
import org.junit.jupiter.api.AfterAll;
import org.junit.jupiter.api.BeforeAll;
import org.junit.jupiter.api.BeforeEach;
import org.junit.jupiter.api.Test;

import com.cssl.mapper.EmpMapper;
import com.cssl.pojo.Emp;

class JTest {
	static SqlSessionFactory ssf = null;
	static EmpMapper mapper = null;
	static SqlSession session = null;

	@BeforeAll
	static void beforeAll() {
		try {
			InputStream inputStream = Resources.getResourceAsStream("mybatis-config.xml");
			ssf = new SqlSessionFactoryBuilder().build(inputStream);
			System.out.println("创建成功" + ssf);
		} catch (IOException e) {
			e.printStackTrace();
		}
	}

	@AfterAll
	static void after() {
		session.commit();
	}

	@BeforeEach
	void beforeEach() {
		session = ssf.openSession();
		mapper = session.getMapper(EmpMapper.class);
	}

	// mysql查询全部
	@Test
	void test01() {
		mapper.getAllEmp().forEach(s -> System.out.println(s));
		;
	}

	// mysql根据id查询
	@Test
	void test02() {
		System.out.println(mapper.getEmpById(7788));
	}
    // mysql 测试使用Map作为参数的方式查询
	@Test
 	void test03() {
		Map<String, String> map = new HashMap<String, String>();
		map.put("ename", "SCOTT");
		mapper.getByName(map).forEach(s->System.out.println(s));
	}
	@Test
	void test04(){
		//执行crud操作---容易单词写错,强制类型转换
		Student selectOne = (Student)session.selectOne
		("com.cssl.pojo.Emp.getEmpById",7788);
	}
}
3、源码分析
①SqlSessionFactoty的构建
SqlSessionFactory对象的实例可以通过SqlSessionFactoryBuilder对象类获得,而SqlSessionFactoryBuilder则可以从XML配置文件或一个预先定制的Configuration的实例构建出SqlSessionFactory的实例,首先进入SqlSessionFactoryBuildr的build方法:
  public SqlSessionFactory build(InputStream inputStream, String environment, Properties properties) {
    try {
      // 主要是把配置文件构造成XMLConfigBuilder对象
      // 通俗的说就是拿到config.xml的inputStream,然后解析xml,把配置的信息封装到parser对象里面
      XMLConfigBuilder parser = new XMLConfigBuilder(inputStream, environment, properties);
      return build(parser.parse());
    } catch (Exception e) {
      throw ExceptionFactory.wrapException("Error building SqlSession.", e);
    } finally {
      ErrorContext.instance().reset();
      try {
        inputStream.close();
      } catch (IOException e) {
        // Intentionally ignore. Prefer previous error.
      }
    }
  }
继续跟进parser.parse()
  // 解析config.xml和所有的mapper.xml 封装成Configuration对象返回
  public Configuration parse() {
    if (parsed) {
      throw new BuilderException("Each XMLConfigBuilder can only be used once.");
    }
    parsed = true;
    parseConfiguration(parser.evalNode("/configuration"));
    return configuration;
  }

  private void parseConfiguration(XNode root) {
    try {
      // issue #117 read properties first
      // 下面都是加载config.xml的一些配置信息
      propertiesElement(root.evalNode("properties"));
      Properties settings = settingsAsProperties(root.evalNode("settings"));
      loadCustomVfs(settings);
      loadCustomLogImpl(settings);
      typeAliasesElement(root.evalNode("typeAliases"));
      pluginElement(root.evalNode("plugins"));
      objectFactoryElement(root.evalNode("objectFactory"));
      objectWrapperFactoryElement(root.evalNode("objectWrapperFactory"));
      reflectorFactoryElement(root.evalNode("reflectorFactory"));
      settingsElement(settings);
      // read it after objectFactory and objectWrapperFactory issue #631
      environmentsElement(root.evalNode("environments"));
      databaseIdProviderElement(root.evalNode("databaseIdProvider"));
      typeHandlerElement(root.evalNode("typeHandlers"));
      // 重点是这里:解析config.xml中所有的<mappers>
      mapperElement(root.evalNode("mappers"));
    } catch (Exception e) {
      throw new BuilderException("Error parsing SQL Mapper Configuration. Cause: " + e, e);
    }
  }
继续跟进mapperElement(root.evalNode(“mappers”))
  private void mapperElement(XNode parent) throws Exception {
    if (parent != null) {
      // 遍历config.xml所有的<mappers>
      //                        <mapper resource=""/>
      //                     </mappers>
      for (XNode child : parent.getChildren()) {
        if ("package".equals(child.getName())) {
          String mapperPackage = child.getStringAttribute("name");
          configuration.addMappers(mapperPackage);
        } else {
          String resource = child.getStringAttribute("resource");
          String url = child.getStringAttribute("url");
          String mapperClass = child.getStringAttribute("class");
          if (resource != null && url == null && mapperClass == null) {
            ErrorContext.instance().resource(resource);
            // 获取到mapper.xml文件
            InputStream inputStream = Resources.getResourceAsStream(resource);
            // 把xml封装成对象
            XMLMapperBuilder mapperParser = new XMLMapperBuilder(inputStream, configuration, resource, configuration.getSqlFragments());
            // 解析封装到Configuration对象中
            mapperParser.parse();
          } else if (resource == null && url != null && mapperClass == null) {
            ErrorContext.instance().resource(url);
            InputStream inputStream = Resources.getUrlAsStream(url);
            XMLMapperBuilder mapperParser = new XMLMapperBuilder(inputStream, configuration, url, configuration.getSqlFragments());
            mapperParser.parse();
          } else if (resource == null && url == null && mapperClass != null) {
            Class<?> mapperInterface = Resources.classForName(mapperClass);
            configuration.addMapper(mapperInterface);
          } else {
            throw new BuilderException("A mapper element may only specify a url, resource or class, but not more than one.");
          }
        }
      }
    }
  }
继续跟进mapperParser.parse()
  public void parse() {
    if (!configuration.isResourceLoaded(resource)) {
      configurationElement(parser.evalNode("/mapper"));
      configuration.addLoadedResource(resource);
      // 绑定mapper的namespace
      bindMapperForNamespace();
    }

    parsePendingResultMaps();
    parsePendingCacheRefs();
    parsePendingStatements();
  }

  private void bindMapperForNamespace() {
    String namespace = builderAssistant.getCurrentNamespace();
    if (namespace != null) {
      Class<?> boundType = null;
      try {
        boundType = Resources.classForName(namespace);
      } catch (ClassNotFoundException e) {
        // ignore, bound type is not required
      }
      if (boundType != null && !configuration.hasMapper(boundType)) {
        // Spring may not know the real resource name so we set a flag
        // to prevent loading again this resource from the mapper interface
        // look at MapperAnnotationBuilder#loadXmlResource
        // 实际上是把所有的namespace加入到一个Set集合里面
        configuration.addLoadedResource("namespace:" + namespace);
        // 这里其实是把mapper的类对象通过MapperRegistry对象添加到一个Map里面
        configuration.addMapper(boundType);
      }
    }
  }

  // Configuration.java
  public <T> void addMapper(Class<T> type) {
    mapperRegistry.addMapper(type);
  }
  // MapperRegistry.java
  public <T> void addMapper(Class<T> type) {
    if (type.isInterface()) {
      if (hasMapper(type)) {
        throw new BindingException("Type " + type + " is already known to the MapperRegistry.");
      }
      boolean loadCompleted = false;
      try {
        // private final Map<Class<?>, MapperProxyFactory<?>> knownMappers = new
        //  HashMap<>();
        // 最终这里是把mapper类对象作为key,MapperProxyFactory对象作为value加入到map里面,方
        // 便后面获取 通过动态代理生成Mapper的代理对象
        knownMappers.put(type, new MapperProxyFactory<>(type));
        // It's important that the type is added before the parser is run
        // otherwise the binding may automatically be attempted by the
        // mapper parser. If the type is already known, it won't try.
        MapperAnnotationBuilder parser = new MapperAnnotationBuilder(config, type);
        parser.parse();
        loadCompleted = true;
      } finally {
        if (!loadCompleted) {
          knownMappers.remove(type);
        }
      }
    }
  }
至此SqlSessionFactory的构建就结束了。其核心思想就是把mybatis-config.xml和所有mapper.xml文件解析,然后封装到Configuration对象中。
②SqlSession的获取
SqlSession的获取主要是通过SqlSessionFactory的默认实现类DefaultSqlSessionFactory中的openSessionFromDataSource方法封装一个DefaultSqlSession(DefaulSqlSession是SqlSession的实现类)返回。
  private SqlSession openSessionFromDataSource(ExecutorType execType, TransactionIsolationLevel level, boolean autoCommit) {
    Transaction tx = null;
    try {
      // 从配置对象获取数据库链接信息和事物对象
      final Environment environment = configuration.getEnvironment();
      final TransactionFactory transactionFactory = getTransactionFactoryFromEnvironment(environment);
      tx = transactionFactory.newTransaction(environment.getDataSource(), level, autoCommit);
      // 创建一个Executor对象,用于后面执行SQL脚本
      final Executor executor = configuration.newExecutor(tx, execType);
      return new DefaultSqlSession(configuration, executor, autoCommit);
    } catch (Exception e) {
      closeTransaction(tx); // may have fetched a connection so lets call close()
      throw ExceptionFactory.wrapException("Error opening session.  Cause: " + e, e);
    } finally {
      ErrorContext.instance().reset();
    }
  }
③动态代理获取Mapper对象
在测试方法test04中可以看到,只要获取了SqlSession实例,就可以通过statement(Mapper接口的全限定名+方法名)和参数调用sqlSession的crud方法,这种方式需要强转,而且每次传入statement很麻烦。可以直接调用getMapper方法,通过动态代理生成代理对象直接调用对应的方法,避免程序中的硬编码。
  /**
  * 可以看到我们是从 Configuration对象中的MapperRegistry对象通过类对象作为key获取
  * MapperProxyFactory然后通过jdk的动态代理生成代理对象 (这里也就解释了为什么我们要创建一个
  * Mapper接口而不是实体类)
  * 里面的addMapper()方法是不是似曾相识。
  */
 // MapperRegistry.java  获取Mapper代理对象
  @SuppressWarnings("unchecked")
  public <T> T getMapper(Class<T> type, SqlSession sqlSession) {
    final MapperProxyFactory<T> mapperProxyFactory = (MapperProxyFactory<T>) knownMappers.get(type);
    if (mapperProxyFactory == null) {
      throw new BindingException("Type " + type + " is not known to the MapperRegistry.");
    }
    try {
      // 创建一个代理对象
      return mapperProxyFactory.newInstance(sqlSession);
    } catch (Exception e) {
      throw new BindingException("Error getting mapper instance. Cause: " + e, e);
    }
  }

  //MapperProxyFactory.java
  // JDK动态代理创建一个MapperProxy代理对象
  @SuppressWarnings("unchecked")
  protected T newInstance(MapperProxy<T> mapperProxy) {
    return (T) Proxy.newProxyInstance(mapperInterface.getClassLoader(), new Class[] { mapperInterface }, mapperProxy);
  }

  public T newInstance(SqlSession sqlSession) {
    final MapperProxy<T> mapperProxy = new MapperProxy<>(sqlSession, mapperInterface, methodCache);
    return newInstance(mapperProxy);
  }
接下来我们看看代理对象具体干了什么,点开MapperProxy找到invoke()方法
  @Override
  public Object invoke(Object proxy, Method method, Object[] args) throws Throwable {
    try {
      if (Object.class.equals(method.getDeclaringClass())) {
        return method.invoke(this, args);
      } else {
        return cachedInvoker(method).invoke(proxy, method, args, sqlSession);
      }
    } catch (Throwable t) {
      throw ExceptionUtil.unwrapThrowable(t);
    }
  }
  // 调用到这里
  interface MapperMethodInvoker {
    Object invoke(Object proxy, Method method, Object[] args, SqlSession sqlSession) throws Throwable;
  }
  // 主要实现
  private static class PlainMethodInvoker implements MapperMethodInvoker {
    private final MapperMethod mapperMethod;

    public PlainMethodInvoker(MapperMethod mapperMethod) {
      super();
      this.mapperMethod = mapperMethod;
    }

    @Override
    public Object invoke(Object proxy, Method method, Object[] args, SqlSession sqlSession) throws Throwable {
      // 调用mapperMethod的execute()方法
      return mapperMethod.execute(sqlSession, args);
    }
  }
再跟进到MapperMethod的execute()方法
// 可以看到这里通过判断mapper.xml的insert,update,delete, select调用sqlSession的crud方法。
public Object execute(SqlSession sqlSession, Object[] args) {
    Object result;
    switch (command.getType()) {
      case INSERT: {
        Object param = method.convertArgsToSqlCommandParam(args);
        result = rowCountResult(sqlSession.insert(command.getName(), param));
        break;
      }
      case UPDATE: {
        Object param = method.convertArgsToSqlCommandParam(args);
        result = rowCountResult(sqlSession.update(command.getName(), param));
        break;
      }
      case DELETE: {
        Object param = method.convertArgsToSqlCommandParam(args);
        result = rowCountResult(sqlSession.delete(command.getName(), param));
        break;
      }
      case SELECT:
        if (method.returnsVoid() && method.hasResultHandler()) {
          executeWithResultHandler(sqlSession, args);
          result = null;
        } else if (method.returnsMany()) {
          result = executeForMany(sqlSession, args);
        } else if (method.returnsMap()) {
          result = executeForMap(sqlSession, args);
        } else if (method.returnsCursor()) {
          result = executeForCursor(sqlSession, args);
        } else {
          Object param = method.convertArgsToSqlCommandParam(args);
          result = sqlSession.selectOne(command.getName(), param);
          if (method.returnsOptional()
              && (result == null || !method.getReturnType().equals(result.getClass()))) {
            result = Optional.ofNullable(result);
          }
        }
        break;
      case FLUSH:
        result = sqlSession.flushStatements();
        break;
      default:
        throw new BindingException("Unknown execution method for: " + command.getName());
    }
    if (result == null && method.getReturnType().isPrimitive() && !method.returnsVoid()) {
      throw new BindingException("Mapper method '" + command.getName()
          + " attempted to return null from a method with a primitive return type (" + method.getReturnType() + ").");
    }
    return result;
  }
看到这里是不是开头所说的调用方式, 其实动态代理的作用是不是可以理解为,动态生成了一个statement字符串,然后调用sqlsession的crud方法。
④通过Mapper的执行过程
这里我们只通过selectOne分析mapper方法的执行过程,增删改大同小异就不赘述。通过Sqlsession的selectOne跟踪到DefaultSqlSession的selectList方法如下
  @Override
  public <E> List<E> selectList(String statement, Object parameter, RowBounds rowBounds) {
    try {
      // 这个构建也是一个比较复杂的过程,不再跟进
      MappedStatement ms = configuration.getMappedStatement(statement);
      // 主要看这里 executor是不是有印象,openSession会创建一个
      return executor.query(ms, wrapCollection(parameter), rowBounds, Executor.NO_RESULT_HANDLER);
    } catch (Exception e) {
      throw ExceptionFactory.wrapException("Error querying database.  Cause: " + e, e);
    } finally {
      ErrorContext.instance().reset();
    }
  }
Executor接口的实现类有两个,1、CachingExecutor主要是用于二级缓存的数据。2、BaseExecutor没有二级缓存直接执行脚本。这里我们主要看BaseExecutor的query方法
 // BaseExecutor.java
 public <E> List<E> query(MappedStatement ms, Object parameter, RowBounds rowBounds, ResultHandler resultHandler, CacheKey key, BoundSql boundSql) throws SQLException {
    ErrorContext.instance().resource(ms.getResource()).activity("executing a query").object(ms.getId());
    if (closed) {
      throw new ExecutorException("Executor was closed.");
    }
    if (queryStack == 0 && ms.isFlushCacheRequired()) {
      clearLocalCache();
    }
    List<E> list;
    try {
      queryStack++;
      // 一级缓存的判断
      list = resultHandler == null ? (List<E>) localCache.getObject(key) : null;
      if (list != null) {
        handleLocallyCachedOutputParameters(ms, key, parameter, boundSql);
      } else {
        // 不走一级缓存直接查询数据库
        list = queryFromDatabase(ms, parameter, rowBounds, resultHandler, key, boundSql);
      }
    } finally {
      queryStack--;
    }
    if (queryStack == 0) {
      for (DeferredLoad deferredLoad : deferredLoads) {
        deferredLoad.load();
      }
      // issue #601
      deferredLoads.clear();
      if (configuration.getLocalCacheScope() == LocalCacheScope.STATEMENT) {
        // issue #482
        clearLocalCache();
      }
    }
    return list;
  }


  private <E> List<E> queryFromDatabase(MappedStatement ms, Object parameter, RowBounds rowBounds, ResultHandler resultHandler, CacheKey key, BoundSql boundSql) throws SQLException {
    List<E> list;
    localCache.putObject(key, EXECUTION_PLACEHOLDER);
    try {
      // 执行doQuery
      list = doQuery(ms, parameter, rowBounds, resultHandler, boundSql);
    } finally {
      localCache.removeObject(key);
    }
    // 这里简单说一下localCache,一级缓存,通过Map实现,同一session同一条sql会缓存,增删改都会清空
    localCache.putObject(key, list);
    if (ms.getStatementType() == StatementType.CALLABLE) {
      localOutputParameterCache.putObject(key, parameter);
    }
    return list;
  }
接下来就是BaseExecutor的子类实现doQuery()方法执行查询操作。这里说一下BaseExecutor的三个子类。
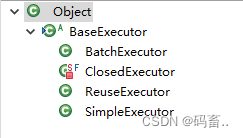
- SimpleExecutor:每执行一次update或select,就开启一个Statement对象,用完立刻关闭Statement对象。
- ReuseExecutor:执行update或select,以sql作为key查找Statement对象,存在就使用,不存在就创建,用完后,不关闭Statement对象,而是放置于Map内,供下一次使用。简言之,就是重复使用Statement对象。
- BatchExecutor:执行update(没有select,JDBC批处理不支持select),将所有sql都添加到批处理中(addBatch()),等待统一执行(executeBatch()),它缓存了多个Statement对象,每个Statement对象都是addBatch()完毕后,等待逐一执行executeBatch()批处理。与JDBC批处理相同。
所以我们这里执行是SimpleExecutor的doQuery()方法
  @Override
  public <E> List<E> doQuery(MappedStatement ms, Object parameter, RowBounds rowBounds, ResultHandler resultHandler, BoundSql boundSql) throws SQLException {
    // 终于看到原生jdbc的Statement
    Statement stmt = null;
    try {
      Configuration configuration = ms.getConfiguration();
      StatementHandler handler = configuration.newStatementHandler(wrapper, ms, parameter, rowBounds, resultHandler, boundSql);
      // 获取stmt对象
      stmt = prepareStatement(handler, ms.getStatementLog());
      return handler.query(stmt, resultHandler);
    } finally {
      closeStatement(stmt);
    }
  }

  private Statement prepareStatement(StatementHandler handler, Log statementLog) throws SQLException {
    Statement stmt;
    // 获取链接信息
    Connection connection = getConnection(statementLog);
    // 这里不跟进了  创建一个PreparedStatement返回
    stmt = handler.prepare(connection, transaction.getTimeout());
    handler.parameterize(stmt);
    return stmt;
  }