Vue双向绑定:实现篇
前面一篇已经将双向绑定原理讲了基本知识,这里通过代码实现一下,会有更深入的了解。
如果对双向绑定或响应式原理不够了解,可以先查看原理分析那篇。
Vue双向绑定(原理篇)
创建项目
-
新建项目文件夹
在文件夹中npm init 初始化项目
-
安装webpack(3个包)
"devDependencies": { "webpack": "^5.71.0", "webpack-cli": "^4.9.2", "webpack-dev-server": "^4.8.1" } -
配置webpack.config.js
入口和出口
const path = require('path'); module.exports = { entry: path.join(__dirname, "/src/index.js"), // 入口文件 output: { path: path.join(__dirname, "/dist"), //打包后的文件存放的地方 filename: "bundle.js" //打包后输出文件的文件名 } } -
src文件夹
新建src文件夹,用来放置创建的文件,结构如下:
src(文件夹)
	index.js
	utils.js
	mvvm(文件夹)
		dep.js
		mvvm.js
		watcher.js
		compiler(文件夹)
			compiler.js
			directiveCompiler.js
			textCompiler.js
		observer(文件夹)
			observer.js
			array.js
下面开始撸代码。
MVVM类
在MVVM.js文件中
-
初始化
前面介绍过,vue是Vue类的实例,Vue类在constructor中接收参数进行实例化。这里使用MVVM类模拟一下
export default class MVVM { constructor(options) { this.$el = options.el // 获取挂载点 this.$data = options.data //为Vue实例初始化数据 this.proxyData(this.$data) // 实现侵入式修改data observe(this.$data) // 对data进行数据劫持 if (this.$el) new Compiler(this.$el, this) //编译模板和指令 } proxyData(data){ ... } } -
proxyData(this.$data)
在vue中,可以通过this.xxx的方式直接获取到数据,这里通过proxyData实现
proxyData(data) { Object.keys(data).forEach((key) => { Object.defineProperty(this, key, { get() { return data[key] }, set(newVal) { if (data[key] === newVal) return data[key] = newVal } }) }) } -
observe(this.$data)
在observer.js文件中导入,用于监听数据
import { observe } from './observer/observer' -
new Compiler(this.$el, this)
在compiler.js文件中导入,用于解析模板
import { Compiler } from './compiler/compiler'
Observer类
在observer.js文件中
-
observe方法
如果data为对象且未进行监听,就实例化observer并绑定到
__ob__属性上observe(value) { if (typeof value !== 'object') return let ob // 判断__ob__属性,避免重复实例化observer if (value.__ob__ && value.__ob__ instanceof Observer) { ob = value.__ob__ } else { ob = new Observer(value) } return ob } -
Observer类
数据劫持和实例化dep收集依赖
export class Observer { constructor(value) { this.value = value this.dep = new Dep() // 实例化dep?? def(value, '__ob__', this) // 将实例化observer放置在对象的__ob__属性上 if (Array.isArray(value)) { //数组的方法处理 Object.setPrototypeOf(value, proxyPrototype) this.observeArray(value) } else { this.walk(value) // 对象处理方式 } } walk(obj) { Object.keys(obj).forEach((key) => defineReactive(obj, key, obj[key])) } observeArray(arr) { arr.forEach((i) => observe(i)) } } -
__ob__属性调用def方法进行添加,避免重复监听。该方法封装在utils.js中的方法。
export function def(obj, key, value, enumerable = false) { Object.defineProperty(obj, key, { value, enumerable, writable: true, configurable: true }) } -
对象
对于监听的对象
-
如果属性值 val 也是对象,那么也需要将该对象设置为响应式
let childOb = observe(val) // 递归地为数据设置响应式,val为属性值也就是说,如果属性值 val 是一个对象,那该属性值不仅通过闭包的方式保存了自己的
dep,也通过__ob__属性保存了自己的Observer实例。属性值val的
dep与__ob__中的dep保存的内容相同举个例子:
obj{
	a: {
		b: xx;
		__ob__:{...}
	},
   c: xx;
   __ob__: {...}
   }
// obj.a通过闭包保存的dep,与a.__ob__通过闭包保存的dep,两个保存的watcher相同
// obj.c是原始类型,所以只有闭包保存的dep,没有__ob__属性中的dep
为什么两个dep保存的watcher是一样的?
在下面的
get()方法中会找到答案 -
get()方法是在模板中使用了该数据时调用,调用时实例化dep并依赖收集get: function reactiveGetter() { if (Dep.target) { // 全局中有Watcher dep.depend() // 收集Wathcer } return val },如果属性值是对象/数组,那么需要进行如下修改
作为属性值的对象/数组会添加
__ob__属性,并在被访问时进行依赖收集,收集的依赖时保存在Dep.target中的Watcher,与前面dep.depend()收集的Watcher相同get: function reactiveGetter() { if (Dep.target) { dep.depend() if (childOb) {// 前面对childob进行observe,如果有结果,说明为对象或数组 childOb.dep.depend() // __ob__属性的dep进行收集watcher if (Array.isArray(val)) { dependArray(val) } } } return val },如果属性值是数组,如果依赖了数组中的某个元素,那就相当于依赖了整个数组。因为数组的元素没有dep,只有数组的
__ob__属性上有dep。所以需要遍历数组,然后对于有
__ob__属性(对象或数组)的属性值进行依赖收集。如果包含多层数组,需要递归进入每一层数组。function dependArray(array) { for (let e of array) { e && e.__ob__ && e.__ob__.dep.depend() if (Array.isArray(e)) { dependArray(e) } }、 } -
set()方法在对Vue实例中的数据进行修改的调用,然后调用dep.notify()通知依赖。注意新值如果是对象,也要监听。set: function reactiveSetter(newVal) { if (val === newVal) { return } val = newVal childOb = observe(newVal) // 设置的新值如果是对象,也要监听 dep.notify() } -
整体代码如下
  function defineReactive(data, key, val) {
    const dep = new Dep()???
    let childOb = observe(val)  // 递归地为数据设置响应式
    Object.defineProperty(data, key, {
      enumerable: true,
      configurable: true,
      get: function reactiveGetter() {
        if (Dep.target) {
          dep.depend()
          if (childOb) {// 判断属性值是否为对象或数组
            childOb.dep.depend()
            if (Array.isArray(val)) {
              dependArray(val)
            }
          }
        }
        return val
      },
      set: function reactiveSetter(newVal) {
        if (val === newVal) {
          return
        }
        val = newVal
        childOb = observe(newVal)
        dep.notify()
      }
    })
  }
  function dependArray(array) {
    for (let e of array) {
      e && e.__ob__ && e.__ob__.dep.depend()
      if (Array.isArray(e)) {
        dependArray(e)
      }
    }
  }
-
-
数组方法
- 思路(原型链)
-
将proxyPrototype的隐式原型指向Array.prototype
-
将proxyPrototype作为数组类型数据的隐式原型
-
所以proxyPrototype上设置的七种方法会覆盖Array.prototype上的七种方法
-
只要让proxyPrototype的方法中执行数组原有的方法,并返回该结果,不同点就是需要触发更新
-
还要注意
push, unshift, splice可能会向数组中增加元素,这些增加的元素也应该被监听
-
代码实现
在array.js中定义proxyPrototype,observer.js从该文件引入
const reactiveMethods = [ 'push', 'pop', 'unshift', 'shift', 'splice', 'reverse', 'sort' ] // 让 proxyPrototype 的隐式原型指向 Array.prototype const arrayPrototype = Array.prototype const proxyPrototype = Object.create(arrayPrototype) reactiveMethods.forEach((method) => { const originalMethod = arrayPrototype[method] // 获取原有方法 Object.defineProperty(proxyPrototype, method, { // 在proxyPrototype对象设置这几个方法,但是做了修改,让这几个方法可以触发更新 value: function reactiveMethod(...args) { const result = originalMethod.apply(this, args) // 执行原有方法,并在后面返回该结果 const ob = this.__ob__ let inserted = null switch (method) { case 'push': case 'unshift': inserted = args break case 'splice': inserted = args.slice(2) // 第二个参数 } if (inserted) ob.observeArray(inserted) // 监听新增的的数据 ob.dep.notify() // 通知更新 return result }, enumerable: false, writable: true, configurable: true }) }) export default proxyPrototype -
数组与对象的区别
对象是每个属性值都有自己的dep实例,数组只有
__ob__属性上有dep实例。所以修改对象的属性值,会通知该属性dep中的依赖进行更新
而通过下标修改数组的元素时,无法通知dep中的依赖
所以通过修改数组方法,在数组原有方法的基础上,在方法中通知
__ob__属性上的dep保存的依赖,例如push方法,不改变原有功能,但是在进行push时,会通知__ob__属性上的dep,从而触发更新,同时对新增的数据进行监听。
Dep类
在dep.js文件中
-
依赖数组和方法
在dep中,通过subs数组存放Watcher,提供addSub方法和removeSub方法进行增加删除Watcher
export default class Dep { constructor() { this.subs = [] // 提供维护依赖数组,存放Watcher } addSub(sub) { // 提供收集Watcher方法 this.subs.push(sub) } removeSub(sub) { // 提供移除Watcher方法 remove(this.subs, sub) } ... } function remove(arr, item) { if (!arr.length) return const index = arr.indexOf(item) if (index > -1) { return arr.splice(index, 1) } } -
收集依赖
前面经常调用的dep.depend(),就是这个方法。但是调用这个方法不一定会收集依赖,需要Dep.target中有Watcher,也就是说,控制权在Watcher。只有Watcher将自己保存在全局,才能获取并调用Watcher中的 addDep(this) 方法进行收集依赖
depend() { if (Dep.target) { // Dep.target 为当前的Watcher Dep.target.addDep(this) } } -
避免重复收集依赖
// Dep类外面初始化 let uid = 0 // Dep类的constructor constructor() { this.subs = [] this.id = uid++ // id每新增一个会加1 } -
父子组件
-
思路
新建父组件watcher时,window.target会指向父组件watcher
之后新建子组件watcher,window.target将被子组件watcher覆盖
子组件渲染完毕,回到父组件watcher时,window.target变成了null这就会出现问题
因此,我们用一个栈结构来保存watcher。先进先出
-
代码实现
Dep.target = null;
const targetStack = []
export function pushTarget(_target) {
  targetStack.push(Dep.target) //在数组最后增加元素
  Dep.target = _target
}

export function popTarget() {
  Dep.target = targetStack.pop() // pop删除数组最后一个元素,并返回被删元素
}
-
-
通知依赖
提供notify()方法,当对象属性修改触发了set方法,在set方法中会调用dep.notify(),通知所有该属性的Watcher,进行视图更新。
notify() { // 提供触发Watcher方法
  const subs = [...this.subs]
  subs.forEach((w) => w.update()) //遍历依赖数组,触发所有Watcher
}
Compiler类
-
整体思路
compiler类的作用的编译节点,先将挂载的节点从页面取出,编译完成后再放回去,中间需要对元素节点、文本节点进行编译和对vue的指令进行解析
class Compiler { constructor(el, vm) { // el可以是选择器或元素节点 this.el = isElementNode(el) ? el : document.querySelector(el) this.vm = vm let fragment = node2Fragment(this.el) this.compile(fragment) this.el.appendChild(fragment) } } function isElementNode(node) { return node.nodeType === 1 } function node2Fragment(node) { let fragment = document.createDocumentFragment() let firstChild = node.firstChild while (firstChild) { fragment.appendChild(firstChild) firstChild = node.firstChild } return fragment }。 -
主编译程序
对元素节点和文本节点进行编译
// 主编译方法 compile(node) { let childNodes = Array.from(node.childNodes) childNodes.forEach((c) => { if (isElementNode(c)) { this.compileElementNode(c) } else { this.compileTextNode(c) } }) } // 元素节点编译方法 compileElementNode(node) { Array.from(node.attributes).forEach(({ name, value: expression }) => { if (isDirective(name)) { // 判断属性名是否有v- const directive = name.split('-')[1] new Watcher( this.vm, directiveCompiler[directive](node, expression, this.vm) ) } }) this.compile(node) } compileTextNode(node) { if (/\{\{(.+?)\}\}/g.test(node.textContent)) { new Watcher(this.vm, textCompiler(node, this.vm)) } } } // 文本解析方法,在textCompiler.js文件中 export default function(node, vm) { const text = node.textContent return function() { const content = text.replace(/\{\{(.+?)\}\}/g, (...args) => { const path = args[1].trim() const val = parsePath(path).call(vm, vm) if (isObject(val)) { return JSON.stringify(val, null, 1) // 第三个参数:空格数量 } return val }) node.textContent = content } } -
指令解析
// 指令解析器 function setValue(vm, expression, value) { const keys = expression.split('.') let obj = vm.$data for (let i = 0; i < keys.length - 1; i++) { obj = obj[keys[i]] } obj[keys.slice(-1)] = value } // 只处理了v-model指令 export default { model(node, expression, vm) { node.addEventListener('input', (e) => setValue(vm, expression, e.target.value) ) const value = parsePath(expression).call(vm, vm) return function() { node.value = value } } } -
实例化Watcher
在文本解析中出现
{{}}和指令解析中出现v-(这里以v-model为例),就会创建Watcher实例渲染
watcher接收一个渲染函数,当依赖发生变化时,自动执行渲染函数new Watcher(app, renderFn)利用这种方法,每遇到一个插值表达式就会新建一个
watcher,这样每个节点就会对应一个watcher。实际上这是vue1.x的做法,以节点为单位进行更新,粒度较细。而vue2.x的做法是每个组件对应一个watcher,实例化watcher时传入的也不再是一个expression,而是渲染函数,渲染函数由组件的模板转化而来,这样一个组件的watcher就能收集到自己的所有依赖,以组件为单位进行更新,是一种中等粒度的方式。
Watcher类
在watcher.js文件中
-
基本思路
Watcher实例的
get方法会读取数据的值,从而触发了数据的getter,getter执行完毕后,Watcher实例的get方法执行完毕,并返回值,constructor执行完毕,实例化完毕。export default class Watcher { constructor(vm, expOrFn, cb) { this.vm = vm this.cb = cb // 更新回调 // 修改 if (typeof expOrFn === 'function') { this.getter = expOrFn } else { this.getter = parsePath(expOrFn) } this.value = this.get() }; get() { pushTarget(this) // 修改Dep.target const vm = this.vm const value = this.getter.call(vm, vm) popTarget() // 修改Dep.target this.cleanUpDeps() // 本次执行的dep放入上次的dep中 return value }; -
避免重复收集依赖
前面介绍过,每个dep都有id,所以在watcher中保存dep和id
// 在constructor中加入
this.deps = []
this.depIds = new Set()
// 存放本次执行时存储自己的dep和id
this.newDeps = []
this.newDepIds = new Set()
每次取值完毕后,会交换
dep与newDep,并将newDep清空 -
收集依赖
// 决定是否收集依赖,避免重复收集 addDep(dep) { const id = dep.id if (!this.newDepIds.has(id)) { this.newDepIds.add(id) this.newDeps.push(dep) if (!this.depIds.has(id)) { dep.addSub(this) } } }; -
删除依赖
// 删除依赖 cleanUpDeps() { let i = this.deps.length while (i--) { const dep = this.deps[i] if (!this.newDepIds.has(dep.id)) { // 移除dep中的Watcher dep.removeSub(this) } }; // 替换deps和newDeps,还有id,清空新的,为下次做准备 let tmp = this.depIds this.depIds = this.newDepIds this.newDepIds = tmp this.newDepIds.clear() tmp = this.deps this.deps = this.newDeps this.newDeps = tmp this.newDeps.length = 0 }; -
触发更新
// 数据变化时,派发更新
update() {
  const value = this.get()
  if (value !== this.value || isObject(value)) {
    const oldValue = this.value
    this.value = value
    this.cb.call(this.vm, value, oldValue)
  }
}
$set 和 $delete
在mvvm.js中添加这两个两个方法
-
definePropty的缺陷
从前面的代码可以看出,直接修改数组的元素是不能被监听到的,还有就是,给对象新增属性,该属性也无法被监听到。
这时候就需要到
$set()和$delete -
$set
- 数组新增元素通过
splice()方法实现(改造后的方法,会触发更新) - 对象先进行判断属性是否存在或不是响应式对象,排除这两种可能之后,新增属性,调用
defineReactive()设置响应式,再执行ob.dep.notify()触发更新
$set(target, key, value) { // 对于数组利用splice实现 if (Array.isArray(target)) { target.length = Math.max(target.length, key) target.splice(key, 1, value) return value } // 对于对象,如果该属性已经存在,直接赋值 if (key in target && !(key in Object.prototype)) { target[key] = value return value } const ob = target.__ob__ // 如果不是响应式对象,直接赋值 if (!ob) { target[key] = value return value } // 设置响应式属性 defineReactive(target, key, value) ob.dep.notify() return value } - 数组新增元素通过
-
$delete
数组一样使用
splice()对象是先排除属性不再自身上和该对象不是响应式对象两种情况后,执行
delete target[key]和ob.dep.notify()$delete(target, key) { if (Array.isArray(target)) { target.splice(key, 1) return } const ob = target.__ob__ if (!target.hasOwnProperty(key)) return delete target[key] if (!ob) return ob.dep.notify() }
总结
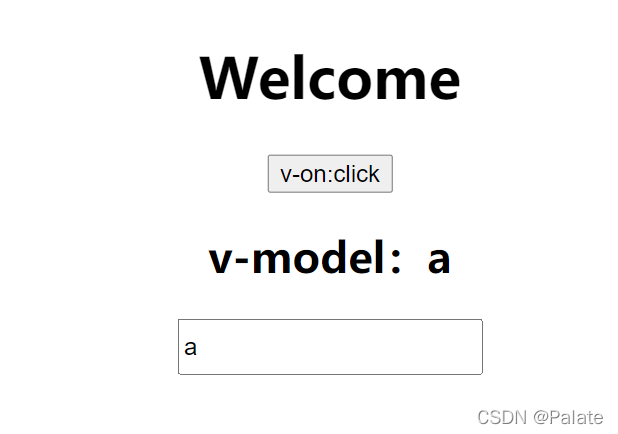
对项目进行打包,将打包后的JS文件引入html中,就可以使用类似Vue的语法了
这里附上项目的github地址,欢迎start