Hibernate实战(第二版)笔记----第二章--开启一个项目
最近在看Hibernate实战(第二版)这本书,个人感觉翻译的不是很好,有些地方读都读不通。。。
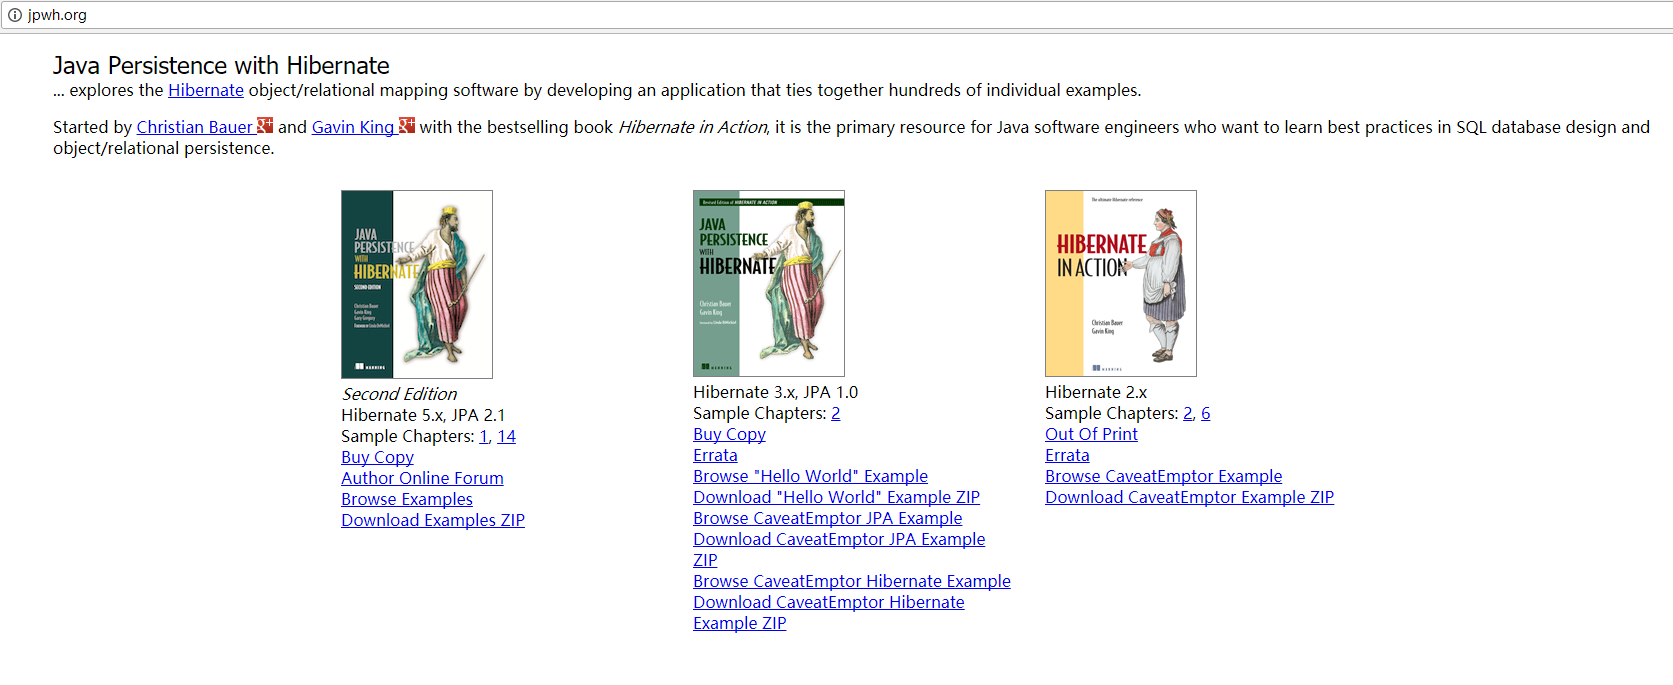
随便做下笔记,书中提供下载源码的地址为: http://jpwh.org
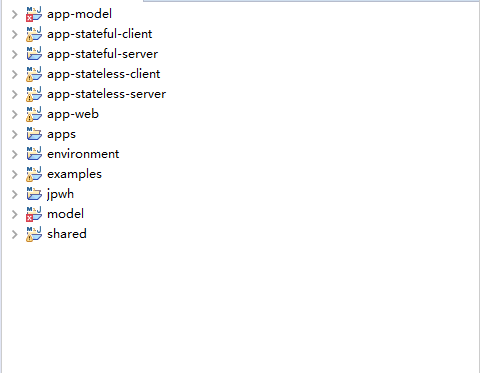
下载下来之后,目录如下

其中:
apps----第18/19章对应的客服端与服务端程序
environment----一些通用的环境
examples----一些实例
model---一些实体类
shared---共享的一些帮助类什么的
README.txt说明文件如下:
==============================================================================
Java Persistence with Hibernate - Second Edition

http://www.manning.com/bauer3/

==============================================================================


入门
------------------------------------------------------------------------------

- Install JDK 7.

- Install Maven 3.x.

- 运行'mvn clean test'来执行所有的例子(这将需要一段时间
  依赖关系必须首次下载)。

- 打开报告 examples/target/surefire-reports/index.html

- 详细了解每个子目录的pom.xml文件中的模块并进行浏览
  源代码。

- 获取更多的日志输出, 编辑 shared/src/main/resources/logging.properties
  并运行测试。 所有日志输出都将写入文件
  examples/target/surefire-reports/TestSuite-output.txt

- 要仅运行单个测试,请先将模块安装到您的本地Maven中
  存储库使用'mvn clean install'。 然后运行测试:

      mvn -pl examples -Dtest=org.jpwh.test.simple.CRUD clean test

- 如果只运行单个测试,则控制台日志输出将被写入
  在以前的情况下,一个不同的文件:

  examples/target/surefire-reports/org.jpwh.test.simple.CRUD-output.txt


运行示例APPS
------------------------------------------------------------------------------

- 安装Wildfly 8.2.0.Final

- 在后台使用 $WILDFLY/bin/standalone.sh运行应用程序服务器

- 运行 "Stateless Client/Server" 示例应用程序:

    mvn -P app-stateless-server clean install
    mvn -P app-stateless-server clean package wildfly:deploy
    mvn -P app-stateless-client clean test
    mvn -P app-stateless-server clean package wildfly:undeploy

- Run the "Stateful Client/Server" example app:

    mvn -P app-stateful-server clean install
    mvn -P app-stateful-server clean package wildfly:deploy
    mvn -P app-stateful-client clean test
    mvn -P app-stateful-server clean package wildfly:undeploy

- Run the "CaveatEmptor Web Application" example:

    mvn -P app-web clean package wildfly:deploy
    Open in browser: http://localhost:8080/app-web/
    mvn -P app-web wildfly:undeploy


运行/浏览外部数据库
------------------------------------------------------------------------------

- 默认情况下,使用内存中H2数据库实例进行测试。 你不能
   使用SQL控制台访问和浏览此数据库。 如果你只想看看
   模式/SQL,如上所述编辑logging.properties。

- 您可以切换到外部已经运行的H2数据库。 首先启动
   数据库通过双击H2.jar文件。 它应该在你的Maven
   存储库(~/.m2/repository/com/h2database/)或者你可以从它下载
   http://h2database.com。 H2网页控制台将打开,你可以简单的
   用户'sa'连接到数据库实例,没有密码。

- 将示例模块安装到本地存储库中:

    mvn clean install

- 运行单个测试方法,并在完成后保留模式/数据:

    mvn -pl examples \
     -Dtest=org.jpwh.test.simple.CRUD#storeAndQueryItems \
     -DconnectionURL=jdbc:h2:tcp://localhost/mem:test \
     -DkeepSchema=true \
     clean test

- 在H2控制台中执行测试方法后浏览数据库。

- 您可以再次执行相同的测试方法,数据库将被清理
   在方法运行之前。 您可以执行相同测试的其他方法
   类,每个测试类使用相同的数据库模式。

- 要执行另一个具有不同模式的测试类的方法,请停止
	在切换测试类时启动H2数据库。请注意,H2
	删除最后一个连接时的内存数据库。如果
	在H2 web控制台断开连接,数据库将被删除。


------------------------------------------------------------------------------

Visit us on the Manning author forum:
    http://www.manning-sandbox.com/forum.jspa?forumID=844
打开Eclipse选择Import
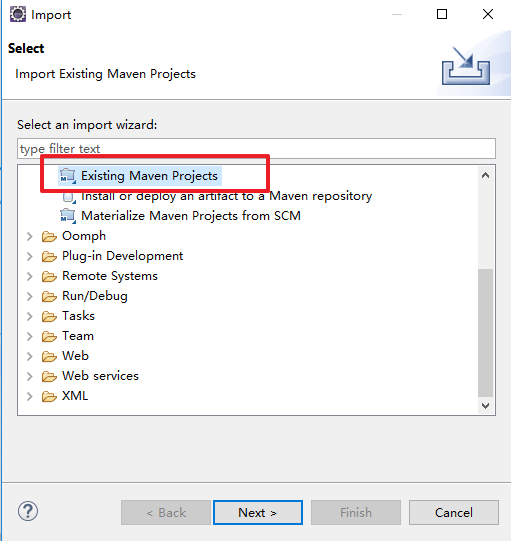
选择一个存在的Maven项目
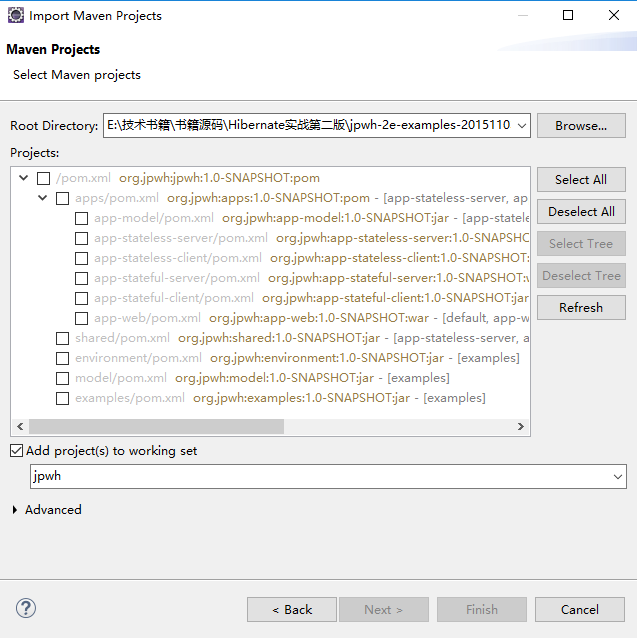
然后点击Finish,完成导入,导入成功之后如下:
导入之后,会报很多错:
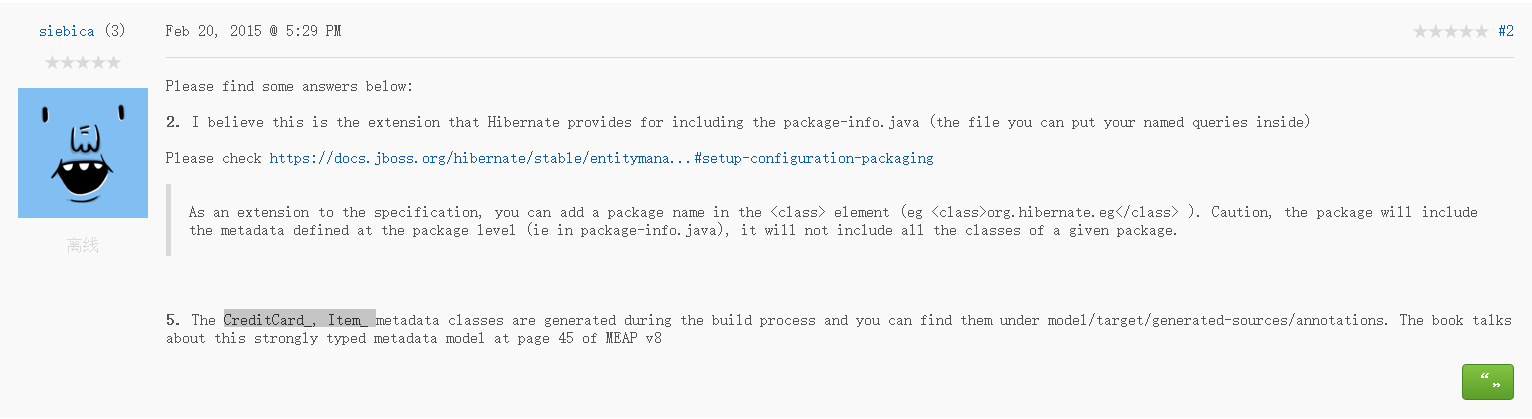
比如说这几个类CreditCard_、 Item_ 、Bid_提示找不到,我找了半天在书中对应的论坛找到了一种说法:https://forums.manning.com/posts/list/35484.page
暂时把那些报错的地方全部注释掉。然后对照着书中的第二章的开启一个项目,运行测试,发现测试用的TestNG框架,然后把TestNG插件装上
(一)、使用JPA的"Hello Word"
它这里使用了持久化单元,什么是持久化单元,网上的解释是,一个持久化单元(Persistence Unit)就是关于一组Entity类的命名配置。持久化单元是一个静态的概念,持久性单元具有唯一的名称,负责定义应用中的一组实体如何进行管理和持久性。在应用中使用persistence.xml文件来设置持久性单元,可以配置多个持久性单元,但每个单元拥有唯一的名称。
持久性单元包含的属性有:
1.在该持久性单元范围(作用域)内的实体类
2.为上述实体类提供持久性的持久性提供者(Persistence Provider)或库
3.上述实体类的数据源(Data Source)
4.应用使用的事务类型(Transaction Type)
5.持久性单元能够被打包成WAR文件,EJB-JAR文件,EAR文件的一部分,或者直接打包成应用程序能够直接使用的JAR文件。
持久性单元的范围(作用域)取决于persistence.xml文件的位置。一般说来,IDE能够使用引导界面来正确放置persistence.xml的位置。例如使用IDE为EJB模块(Module)创建的持久性单元,persistence.xml文件将被放在EJB模块的src/conf目录中,当你将模块打包时,persistence.xml文件被放在EJB JAR文件的META-INF目录中。这样持久性单元的作用域就是EJB JAR文件中的类。
注意:persistence.xml文件的位置决定持久性的根(Persistence Root)。持久性的根为JAR文件或者包含META-INF目录(前提是persistence.xml位于此)的目录。
JPA规范要求在类路径的META-INF目录下放置persistence.xml, 文件的名称是固定的,配置模板如下:
<?xml version="1.0" encoding="UTF-8"?>
<persistence version="2.1"
 xmlns="<a target=_blank href="http://xmlns.jcp.org/xml/ns/persistence">http://xmlns.jcp.org/xml/ns/persistence</a>" xmlns:xsi="<a target=_blank href="http://www.w3.org/2001/XMLSchema-instance">http://www.w3.org/2001/XMLSchema-instance</a>"
 xsi:schemaLocation="<a target=_blank href="http://xmlns.jcp.org/xml/ns/persistence">http://xmlns.jcp.org/xml/ns/persistence</a>
 <a target=_blank href="http://xmlns.jcp.org/xml/ns/persistence/persistence_2_1.xsd">http://xmlns.jcp.org/xml/ns/persistence/persistence_2_1.xsd</a>">

	<persistence-unit name="persist-unit" transaction-type="RESOURCE_LOCAL">

	  <provider>org.eclipse.persistence.jpa.PersistenceProvider</provider>
	  <!-- All persistence classes must be listed -->
	  <class>boa.framework.entity.CustomerEntity</class>                                                                                 <shared-cache-mode>ENABLE_SELECTIVE</shared-cache-mode>
	   <validation-mode>CALLBACK</validation-mode>
	  <properties>
	   <!-- Provider-specific connection properties -->
	   <property name="javax.persistence.jdbc.url" value="jdbc:derby:memory:exampleDB;create=true" />
	   <property name="javax.persistence.jdbc.driver" value="org.apache.derby.jdbc.EmbeddedDriver" />
	   <property name="javax.persistence.jdbc.user" value="" />
	   <property name="javax.persistence.jdbc.password" value="" />
	   <property name="javax.persistence.schema-generation.database.action"
	    value="drop-and-create" />
	   <property name="javax.persistence.schema-generation.create-source"
	    value="script" />
	   <property name="javax.persistence.schema-generation.create-script-source"
	    value="META-INF/create-script.sql" />
	   <property name="eclipseink.logging.level" value="INFO" />
	  </properties>
	 </persistence-unit>


	<!--
		  Name属性用于定义持久化单元的名字 (name必选,空值也合法);
		  transaction-type 指定事务类型(可选)
	-->
	<persistence-unit name="unitName" transaction-type="JTA">

   <!-- 描述信息.(可选) -->
   <description> </description>

   <!-- javax.persistence.PersistenceProvider接口的一个实现类(可选) -->
   <provider>   </provider>

   <!-- Jta-data-source和 non-jta-data-source用于分别指定持久化提供商使用的JTA和/或non-JTA数据源的全局JNDI名称(可选) -->
   <jta-data-source>java:/test</jta-data-source>
   <non-jta-data-source> </non-jta-data-source>

   <!-- 声明orm.xml所在位置.(可选) -->
   <mapping-file>product.xml</mapping-file>

   <!-- 以包含persistence.xml的jar文件为基准的相对路径,添加额外的jar文件.(可选) -->
   <jar-file>../lib/model.jar</jar-file>

   <!-- 显式列出实体类,在Java SE 环境中应该显式列出.(可选) -->
   <class>boa.framework.entity.CustomerEntity</class>

   <!-- 声明是否扫描jar文件中标注了@Enity类加入到上下文.若不扫描,则如下:(可选) -->
   <exclude-unlisted-classes>true</exclude-unlisted-classes>
   shared-cache-mode
  缓存模式。加了@Cacheable注解的默认为二级缓存。有四种模式:ALL-缓存所有实体;NONE-禁止缓存;ENABLE_SELECTIVE-如果加了缓存的标识,是默认的选选        项;DISABLE_SELECTIVE- enable caching unless explicitly marked as  @Cacheable(false) (not  recommended)
  validation-mode
  实体的验证模式,默认是激活的。当一个实体在创建、更新,在实体发送到数据库前会被进行验证。CALLBACK: entities are validated on creation, update and deletion. If no Bean Validation provider  is present, an exception is raised at initialization time.                        <!--    厂商专有属性(可选)    -->
   <properties>
    <!-- hibernate.hbm2ddl.auto= create-drop / create / update -->
      <property name="eclipseink.logging.level" value="INFO" />
   </properties>

	</persistence-unit>

</persistence>
本示例中的persistence.xml内容为:
<persistence
        version="2.1"
        xmlns="http://xmlns.jcp.org/xml/ns/persistence"
        xmlns:xsi="http://www.w3.org/2001/XMLSchema-instance"
        xsi:schemaLocation="http://xmlns.jcp.org/xml/ns/persistence
                            http://xmlns.jcp.org/xml/ns/persistence_2_1.xsd">

    <!--
			<code>persistence.xml</code>文件至少配置一个持久化单元;
			每个单元必须有一个唯一的名称。
    -->
    <persistence-unit name="HelloWorldPU">

        <!--
				每个持久化单元必须有一个数据库连接。在这里你委托给
				现有的<code>java.sql.DataSource</code>。Hibernate会找到数据源
				通过在启动时使用JNDI查找来命名。
        -->
        <jta-data-source>myDS</jta-data-source>

        <!--
				持久单元有持久的(映射)类,您将它们列在这里。
		 -->
        <class>org.jpwh.model.helloworld.Message</class>

        <!--
			Hibernate可以为映射的类扫描类路径并自动添加它们
			给你的坚持单位。
			这种设置禁用了该特性。
        -->
        <exclude-unlisted-classes>true</exclude-unlisted-classes>

        <!--
				可以将标准或供应商特定的选项设置为持久性单元的属性。
				任何标准属性都有 <code>javax.persistence</code> 名称前缀,
				使用Hibernate的设置 <code>hibernate</code>
        -->
        <properties>

            <!--
				JPA引擎应该在启动时自动删除和重新创建数据库中的SQL模式。
				对于自动化测试来说,这是非常理想的,
				当您想要为每个测试运行使用一个干净的数据库时。
            -->
            <property
                name="javax.persistence.schema-generation.database.action"
                value="drop-and-create"/>

            <!--
               	 当在日志中打印SQL时,让Hibernate格式化SQL并将注释生成到SQL字符串中,这样我们就可以知道为什么Hibernate执行SQL语句了
            -->
            <property name="hibernate.format_sql" value="true"/>
            <property name="hibernate.use_sql_comments" value="true"/>

            <!-- 禁用Hibernate扫描,我们也不需要任何的hbm.xml文件。它会发现并自动添加的xml文件 -->
            <property name="hibernate.archive.autodetection" value="none"/>

        </properties>
    </persistence-unit>


</persistence>
里面有很多,这里删除了一些。
找到examples中的HelloWorldJPA
package org.jpwh.helloworld;

import org.jpwh.env.TransactionManagerTest;
import org.jpwh.model.helloworld.Message;
import org.testng.annotations.Test;

import javax.persistence.EntityManager;
import javax.persistence.EntityManagerFactory;
import javax.persistence.Persistence;
import javax.transaction.UserTransaction;
import java.util.List;

import static org.testng.Assert.assertEquals;

public class HelloWorldJPA extends TransactionManagerTest {

    @Test
    public void storeLoadMessage() throws Exception {

        EntityManagerFactory emf =
            Persistence.createEntityManagerFactory("HelloWorldPU");

        try {


        	//初始化代码块
            {
                /*
					访问标准事务API <code>UserTransaction</code>和
					在执行的线程上启动事务。
                 */
                UserTransaction tx = TM.getUserTransaction();
                tx.begin();

                /*
					通过创建一个<code>EntityManager</code>来开始一个新的会话
					是所有持久性操作的上下文。
                 */
                EntityManager em = emf.createEntityManager();

                /*
                    Create a new instance of the mapped domain model class <code>Message</code> and
                    set its <code>text</code> property.
                 */
                Message message = new Message();
                message.setText("Hello World!");

                /*
					 使用持久性上下文来列举瞬态实例,使其持续存在。
                     Hibernate现在知道你想存储的数据,它不一定调用
                     数据库,但是。
                 */
                em.persist(message);

                /*
						提交事务,Hibernate现在自动检查持久化上下文
						执行必要的SQL <code>INSERT</code>语句。
                 */
                tx.commit();
                // INSERT into MESSAGE (ID, TEXT) values (1, 'Hello World!')

                /*
                    If you create an <code>EntityManager</code>, you must close it.
                 */
                em.close();
            }

            {
                /*
					每个与数据库的交互都应该在显式事务边界内发生,
					即使你只是在阅读数据。
                 */
                UserTransaction tx = TM.getUserTransaction();
                tx.begin();

                EntityManager em = emf.createEntityManager();

                /*
					执行一个查询,以从数据库检索<code>Message</code>的所有实例。
                 */
                List<Message> messages =
                    em.createQuery("select m from Message m").getResultList();
                // SELECT * from MESSAGE


                assertEquals(messages.size(), 1);
                assertEquals(messages.get(0).getText(), "Hello World!");


                /*
					您可以更改属性的值,Hibernate会自动检测到这一点,因为
					加载的<code>Message</code>仍然依附于它所加载的持久化上下文。
                 */
                messages.get(0).setText("Take me to your leader!");

                /*
                    On commit, Hibernate checks the persistence context for dirty state and executes the
                    SQL <code>UPDATE</code> automatically to synchronize the in-memory with the database state.
                 */
                tx.commit();
                // UPDATE MESSAGE set TEXT = 'Take me to your leader!' where ID = 1

                em.close();
            }

        } finally {
            TM.rollback();
            emf.close();
        }
    }

}
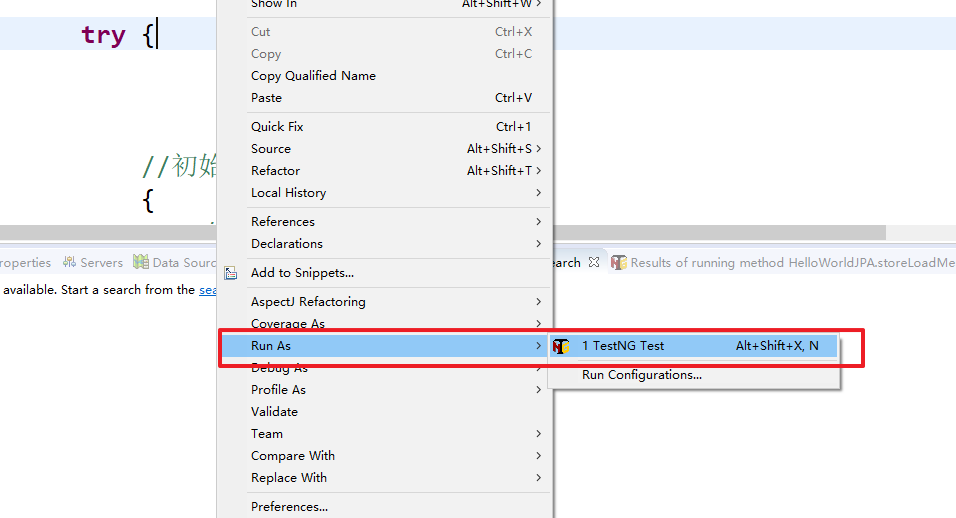
项目右键Run AS---> TestNG运行
输出如下:
PASSED: storeLoadMessage

===============================================
    Default test
    Tests run: 1, Failures: 0, Skips: 0
===============================================

七月 03, 2017 3:44:03 下午 bitronix.tm.BitronixTransactionManager shutdown
信息: shutting down Bitronix Transaction Manager

===============================================
Default suite
Total tests run: 1, Failures: 0, Skips: 0
===============================================

[TestNG] Time taken by org.testng.reporters.jq.Main@5fdef03a: 25 ms
[TestNG] Time taken by [FailedReporter passed=0 failed=0 skipped=0]: 1 ms
[TestNG] Time taken by org.testng.reporters.XMLReporter@77556fd: 4 ms
[TestNG] Time taken by org.testng.reporters.JUnitReportReporter@14899482: 4 ms
[TestNG] Time taken by org.testng.reporters.SuiteHTMLReporter@16b3fc9e: 26 ms
[TestNG] Time taken by org.testng.reporters.EmailableReporter2@ed17bee: 4 ms
接下来分析下他的源码,HelloWorldJPA继承TransactionManagerTest
/environment/src/main/java/org/jpwh/env/TransactionManagerTest.java的内容如下:
package org.jpwh.env;

import org.testng.annotations.AfterSuite;
import org.testng.annotations.BeforeSuite;
import org.testng.annotations.Optional;
import org.testng.annotations.Parameters;

import java.util.Locale;

/**
 * 在测试套件中启动和停止事务管理器/数据库池
 * <p>
 * 一个套件中的所有测试都是单个执行的 {@link TransactionManagerSetup},
 * 调用静态 {@link TransactionManagerTest#TM}
 * 在您的测试中访问JTA事务管理器和数据库连接。
 * </p>
 * <p>
 * 测试参数 <code>database</code> (指定一个支持
 * {@link DatabaseProduct}) 和一个 <code>connectionURL</code>
 * 默认设置是内存中的H2数据库实例,为每个测试套件自动创建和销毁
 * </p>
 */
public class TransactionManagerTest {

    // 每个测试套件静态单数据库连接管理器
    static public TransactionManagerSetup TM;

    @Parameters({"database", "connectionURL"})
    @BeforeSuite()
    public void beforeSuite(@Optional String database,
                            @Optional String connectionURL) throws Exception {
        TM = new TransactionManagerSetup(

    	   //默认使用H2数据库
            database != null
                ? DatabaseProduct.valueOf(database.toUpperCase(Locale.US))
                : DatabaseProduct.H2,
            connectionURL
        );
    }

    @AfterSuite(alwaysRun = true)
    public void afterSuite() throws Exception {
        if (TM != null)
            TM.stop();
    }
}
他里面加了这个类TransactionManagerSetup
/environment/src/main/java/org/jpwh/env/TransactionManagerSetup.java
package org.jpwh.env;

import bitronix.tm.TransactionManagerServices;
import bitronix.tm.resource.jdbc.PoolingDataSource;

import javax.naming.Context;
import javax.naming.InitialContext;
import javax.sql.DataSource;
import javax.transaction.Status;
import javax.transaction.UserTransaction;
import java.util.logging.Logger;

/**
  *提供与Bitronix JTA事务的数据库连接池
  * manager(http://docs.codehaus.org/display/BTM/Home)。
  * <p>
  * Hibernate将通过查找数据源和<code> UserTransaction </code>
  * 通过JNDI,这就是为什么你还需要一个<code> jndi.properties </code>文件。最小的
  * JNDI上下文与Bitronix绑定并启动。
  * </p>
 */
public class TransactionManagerSetup {
    //数据源名称
    public static final String DATASOURCE_NAME = "myDS";

    private static final Logger logger =
        Logger.getLogger(TransactionManagerSetup.class.getName());

    protected final Context context = new InitialContext();
    protected final PoolingDataSource datasource;
    public final DatabaseProduct databaseProduct;

    public TransactionManagerSetup(DatabaseProduct databaseProduct) throws Exception {
        this(databaseProduct, null);
    }

    public TransactionManagerSetup(DatabaseProduct databaseProduct,
                                   String connectionURL) throws Exception {

        logger.fine("Starting database connection pool");

        logger.fine("Setting stable unique identifier for transaction recovery");
        TransactionManagerServices.getConfiguration().setServerId("myServer1234");

        logger.fine("Disabling JMX binding of manager in unit tests");
        TransactionManagerServices.getConfiguration().setDisableJmx(true);

        logger.fine("Disabling transaction logging for unit tests");
        TransactionManagerServices.getConfiguration().setJournal("null");

        logger.fine("Disabling warnings when the database isn't accessed in a transaction");
        TransactionManagerServices.getConfiguration().setWarnAboutZeroResourceTransaction(false);

        logger.fine("Creating connection pool");
        datasource = new PoolingDataSource();
        datasource.setUniqueName(DATASOURCE_NAME);
        datasource.setMinPoolSize(1);
        datasource.setMaxPoolSize(5);
        datasource.setPreparedStatementCacheSize(10);

        //我们的锁定/版本控制测试假设读取提交的事务
        //隔离。这不是默认的MySQL InnoDB,所以我们设置
        //明确地在这里。
        datasource.setIsolationLevel("READ_COMMITTED");

        //Hibernate的SQL模式生成器调用connection.setAutoCommit(true)
        //当EntityManager处于挂起状态时,我们使用自动提交模式
        //模式,并没有加入一个事务。
        datasource.setAllowLocalTransactions(true);

        logger.info("Setting up database connection: " + databaseProduct);
        this.databaseProduct = databaseProduct;
        databaseProduct.configuration.configure(datasource, connectionURL);

        logger.fine("Initializing transaction and resource management");
        datasource.init();
    }

    public Context getNamingContext() {
        return context;
    }

    public UserTransaction getUserTransaction() {
        try {
            return (UserTransaction) getNamingContext()
                .lookup("java:comp/UserTransaction");
        } catch (Exception ex) {
            throw new RuntimeException(ex);
        }
    }

    public DataSource getDataSource() {
        try {
            return (DataSource) getNamingContext().lookup(DATASOURCE_NAME);
        } catch (Exception ex) {
            throw new RuntimeException(ex);
        }
    }

    public void rollback() {
        UserTransaction tx = getUserTransaction();
        try {
            if (tx.getStatus() == Status.STATUS_ACTIVE ||
                tx.getStatus() == Status.STATUS_MARKED_ROLLBACK)
                tx.rollback();
        } catch (Exception ex) {
            System.err.println("Rollback of transaction failed, trace follows!");
            ex.printStackTrace(System.err);
        }
    }

    public void stop() throws Exception {
        logger.fine("Stopping database connection pool");
        datasource.close();
        TransactionManagerServices.getTransactionManager().shutdown();
    }

}
它其中还引用了databaseProduct类databaseProduct类是一个枚举类型的,定义了一些数据库
/environment/src/main/java/org/jpwh/env/DatabaseProduct.java
package org.jpwh.env;

import bitronix.tm.resource.jdbc.PoolingDataSource;

import java.util.Properties;

public enum DatabaseProduct {

    H2(
        new DataSourceConfiguration() {
            @Override
            public void configure(PoolingDataSource ds, String connectionURL) {
                ds.setClassName("org.h2.jdbcx.JdbcDataSource");

                // External instance: jdbc:h2:tcp://localhost/mem:test;USER=sa
                ds.getDriverProperties().put(
                    "URL",
                    connectionURL != null
                        ? connectionURL :
                        "jdbc:h2:mem:test"
                );

                // TODO: http://code.google.com/p/h2database/issues/detail?id=502
                ds.getDriverProperties().put("user", "sa");

                // TODO: Don't trace log values larger than X bytes (especially useful for
                // debugging LOBs, which are accessed in toString()!)
                // System.setProperty("h2.maxTraceDataLength", "256"); 256 bytes, default is 64 kilobytes
            }
        },
        org.jpwh.shared.ImprovedH2Dialect.class.getName()
    ),

    ORACLE(
        new DataSourceConfiguration() {
            @Override
            public void configure(PoolingDataSource ds, String connectionURL) {
                ds.setClassName("oracle.jdbc.xa.client.OracleXADataSource");
                ds.getDriverProperties().put(
                    "URL",
                    connectionURL != null
                        ? connectionURL :
                        "jdbc:oracle:thin:test/test@192.168.56.101:1521:xe"
                );

                // Required for reading VARBINARY/LONG RAW columns easily, see
                // http://stackoverflow.com/questions/10174951
                Properties connectionProperties = new Properties();
                connectionProperties.put("useFetchSizeWithLongColumn", "true");
                ds.getDriverProperties().put("connectionProperties", connectionProperties);
            }
        },
        org.hibernate.dialect.Oracle10gDialect.class.getName()
    ),

    POSTGRESQL(
        new DataSourceConfiguration() {
            @Override
            public void configure(PoolingDataSource ds, String connectionURL) {
                ds.setClassName("org.postgresql.xa.PGXADataSource");
                if (connectionURL != null) {
                    throw new IllegalArgumentException(
                        "PostgreSQL XADataSource doesn't support connection URLs"
                    );
                }
                ds.getDriverProperties().put("serverName", "10.0.0.2");
                ds.getDriverProperties().put("databaseName", "test");
                ds.getDriverProperties().put("user", "test");
                ds.getDriverProperties().put("password", "test");
            }
        },
        org.hibernate.dialect.PostgreSQL82Dialect.class.getName()
    ),

    MYSQL(
        new DataSourceConfiguration() {
            @Override
            public void configure(PoolingDataSource ds, String connectionURL) {
                // TODO: MySQL XA support is completely broken, we use the BTM XA wrapper
                //ds.setClassName("com.mysql.jdbc.jdbc2.optional.MysqlXADataSource");
                ds.setClassName("bitronix.tm.resource.jdbc.lrc.LrcXADataSource");
                ds.getDriverProperties().put(
                    "url",
                    connectionURL != null
                        ? connectionURL :
                        "jdbc:mysql://localhost/test?sessionVariables=sql_mode='PIPES_AS_CONCAT'"
                );

                ds.getDriverProperties().put("driverClassName", "com.mysql.jdbc.Driver");
            }
        },
        // Yes, this should work with 5.6, no idea why Gail named it 5.7
        org.hibernate.dialect.MySQL57InnoDBDialect.class.getName()
    );

    public DataSourceConfiguration configuration;
    public String hibernateDialect;

    private DatabaseProduct(DataSourceConfiguration configuration,
                            String hibernateDialect) {
        this.configuration = configuration;
        this.hibernateDialect = hibernateDialect;
    }

    public interface DataSourceConfiguration {

        void configure(PoolingDataSource ds, String connectionURL);
    }

}
(二)、原生Hibernate配置
HelloWorldHibernate测试类
/examples/src/test/java/org/jpwh/helloworld/HelloWorldHibernate.java
package org.jpwh.helloworld;

import org.hibernate.Session;
import org.hibernate.SessionFactory;
import org.hibernate.boot.Metadata;
import org.hibernate.boot.MetadataBuilder;
import org.hibernate.boot.MetadataSources;
import org.hibernate.boot.registry.StandardServiceRegistryBuilder;
import org.hibernate.cfg.Environment;
import org.hibernate.resource.transaction.backend.jta.internal.JtaTransactionCoordinatorBuilderImpl;
import org.hibernate.service.ServiceRegistry;
import org.jpwh.env.TransactionManagerTest;
import org.jpwh.model.helloworld.Message;
import org.testng.annotations.Test;

import javax.transaction.UserTransaction;
import java.util.List;

import static org.testng.Assert.*;

public class HelloWorldHibernate extends TransactionManagerTest {

    protected void unusedSimpleBoot() {
        SessionFactory sessionFactory = new MetadataSources(
            new StandardServiceRegistryBuilder()
                .configure("hibernate.cfg.xml").build()
        ).buildMetadata().buildSessionFactory();
    }

    protected SessionFactory createSessionFactory() {

        /*
		          此构建器可帮助您创建不可变服务注册表
             链接方法调用。
         */
        StandardServiceRegistryBuilder serviceRegistryBuilder =
            new StandardServiceRegistryBuilder();

        /*
                         通过应用设置配置服务注册表。
         */
        serviceRegistryBuilder
            .applySetting("hibernate.connection.datasource", "myDS")
            .applySetting("hibernate.format_sql", "true")
            .applySetting("hibernate.use_sql_comments", "true")
            .applySetting("hibernate.hbm2ddl.auto", "create-drop");

        // 启用JTA(这有点粗糙,因为Hibernate开发人员仍然相信JTA是
        // 仅用于怪异的应用服务器,您将永远不会看到此代码)。
        serviceRegistryBuilder.applySetting(
            Environment.TRANSACTION_COORDINATOR_STRATEGY,
            JtaTransactionCoordinatorBuilderImpl.class
        );
        ServiceRegistry serviceRegistry = serviceRegistryBuilder.build();

        /*
		       您只能使用现有服务注册表输入此配置阶段。
		 */
        MetadataSources metadataSources = new MetadataSources(serviceRegistry);

        /*
			将持久化类添加到(映射)元数据源。
		*/
        metadataSources.addAnnotatedClass(
            org.jpwh.model.helloworld.Message.class
        );

        // 添加hbm.xml映射文件
        // metadataSources.addFile(...);

        // 从JAR读取所有hbm.xml映射文件
        // metadataSources.addJar(...)

        MetadataBuilder metadataBuilder = metadataSources.getMetadataBuilder();

        Metadata metadata = metadataBuilder.build();

        assertEquals(metadata.getEntityBindings().size(), 1);

        SessionFactory sessionFactory = metadata.buildSessionFactory();

        return sessionFactory;
    }

    @Test
    public void storeLoadMessage() throws Exception {
        SessionFactory sessionFactory = createSessionFactory();
        try {
            {
                /*
					 访问标准事务API <code> UserTransaction </code>和
                     在这个执行线程上开始一个事务。
                 */
                UserTransaction tx = TM.getUserTransaction();
                tx.begin();

                /*
					 每当你在同一个线程中调用<code> getCurrentSession()</code>
                     相同的<code> org.hibernate.Session </code>。 它会自动被绑定到
					 正在进行的事务,在该事务时自动关闭提交或回滚。
                 */
                Session session = sessionFactory.getCurrentSession();

                Message message = new Message();
                message.setText("Hello World!");

                /*
					  本机Hibernate API与标准的Java Persistence API和大多数方法非常相似
                     有相同的名字。
                 */
                session.persist(message);

                /*
					 Hibernate将会话与数据库同步并关闭“当前”
                     会话自动提交绑定事务。
                 */
                tx.commit();
                // INSERT into MESSAGE (ID, TEXT) values (1, 'Hello World!')
            }

            {
                UserTransaction tx = TM.getUserTransaction();
                tx.begin();

                /*
					 Hibernate标准查询是表达查询的类型安全的编程方式,
                     自动翻译成SQL。
                 */
                List<Message> messages =
                    sessionFactory.getCurrentSession().createCriteria(
                        Message.class
                    ).list();
                // SELECT * from MESSAGE

                assertEquals(messages.size(), 1);
                assertEquals(messages.get(0).getText(), "Hello World!");

                tx.commit();
            }

        } finally {
            TM.rollback();
        }
    }
}
总结:
本章主要讲解了两种持久化API的用法
1、EntityManagerFactory
2、SessionFactory
对于这两种方法的区别可查考这:http://javabeat.net/jpa-entitymanager-vs-hibernate-sessionfactory/?utm_source=tuicool&utm_medium=referral 我把它翻译下
JPA EntityManagerFactory Vs Hibernate’s SessionFactory
如果你正在使用JPA的标准规范执行(读:介绍JPA),然后您可以使用EntityManagerFactory打开会话。但是,如果您使用的是Hibernate实现,你有Hibernate特定SessionFactory管理会议。这里有很多开发者喜欢哪一个是最好的方法混淆。在这里,有两种意见是受欢迎的:
1、EntityManagerFactory是标准实现,在所有实现中都是相同的。如果我们将ORM迁移到任何其他提供者,处理事务的方法将不会发生任何变化。相反,如果使用hibernate的会话工厂,它与hibernate api绑定,不会轻易迁移到新的供应商。
2、使用标准实现的一个不利之处在于它不提供高级功能。 在EntityManager API中没有提供很多控件。 而Hibernate的SessionFactory有很多高级功能,在JPA中无法完成。 一个这样的事情是检索ID生成器而不关闭事务,批量插入等。
看了以上几点,必须决定哪一个是更好的。没有硬性规定,毕竟这取决于开发商的要求。另一个建议是,我们可以用实体和会话工厂经理一起。在这种方法中,实体管理代表会议处理Hibernate通过调用Unwrap方法。这样地:
Session session = entityManager.unwrap(Session.class);使用EntityManagerFactory方法,我们可以使用@PrePersist,@ PostPersist,@PreUpdate等回调方法注释,无需额外的配置。 使用SessionFactory时使用类似的回调需要额外的努力。