初识Umi.JS

什么是Umi.js?
Umi,中文可发音为乌米,是可扩展的企业级前端应用框架。Umi 以路由为基础的,同时支持配置式路由和约定式路由,保证路由的功能完备,并以此进行功能扩展。然后配以生命周期完善的插件体系,覆盖从源码到构建产物的每个生命周期,支持各种功能扩展和业务需求。
为什么使用Umi.js?
我们做react开发的时候会不会遇到以下问题?:
1.项目做大的时候,开发调试的启动和热更新时间会变得很长。
2.大应用下,网站打开很慢,有没有办法基于路由做到按需加载。
3.dva的model每次都要手写载入,能否一开始就同项目初始化好?
使用乌米,即可解决以上问题,并且还能提供如下优势:
- 🎉开箱即用,内置 react、react-router 等
- 📦类 next.js 且功能完备的路由约定,同时支持配置的路由方式
- 🐠完善的插件体系,覆盖从源码到构建产物的每个生命周期
- 🚀 一键兼容到 IE9
- 🍉完善的 TypeScript 支持
- 🍗与 dva 数据流的深入融合
umi 有 2 和 3 两个版本。两个版本的使用都差不多。umi2 对 javascript 支持比较好,umi3 默认支持 typeScript
起步Umi
node环境安装
建议安装最新的稳定版本,笔者这里为 14.15.3。同时建议使用 yarn
Umi快速上手
创建空目录 umi-learn
# 新建应用
$ mkdir umi-learn && cd umi-learn
# 使用命令
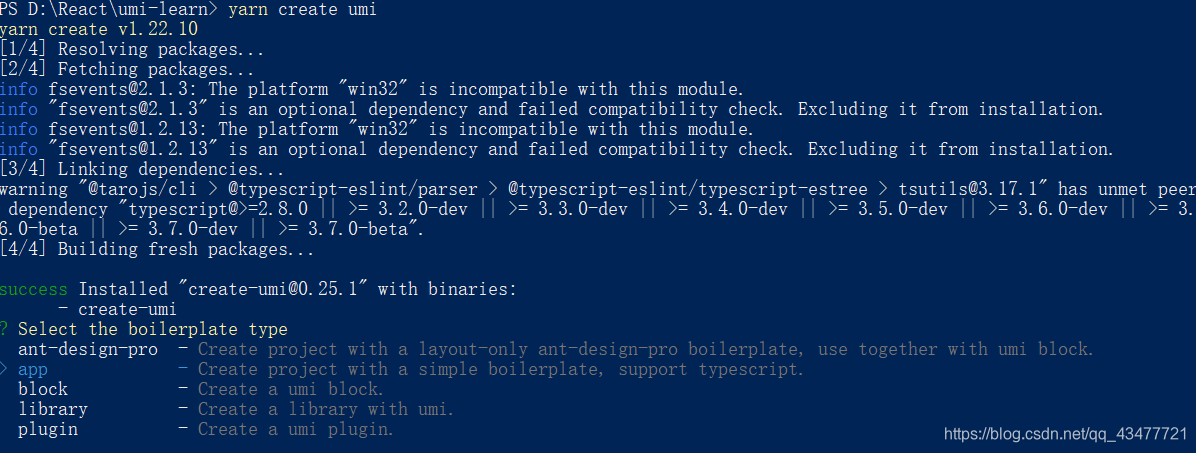
$ yarn create umi
# 安装依赖
$ yarn install
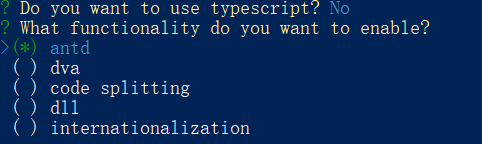
安装过程选择 app
项目工程结构
mock                    // mock文件
src
  |-- assets        	// 静态资源文件
  |-- layouts           // 全局布局文件
  |-- pages           	// 项目页面文件
  |-- globals           // 全局样式
  |--.eslintignore     // eslint过滤文件清单
  |--.eslintrc.js      // eslint配置
  |--.eslintignore     // eslint过滤文件清单
  |--.eslintignore     // eslint过滤文件清单
  |--.umirc.js 		   // umi 配置文件
约定式路由
启动 umi start 后,大家会发现 pages 下多了个 .umi 的目录。不要直接在这里修改代码,umi 重启或者 pages 下的文件修改都会重新生成这个文件夹下的文件,约定 pages 下所有的 (j|t)sx? 文件即路由
动态生成路由
npx umi g page demo
page 目录下生成 demo.js 和 demo.css。.umirc.js 会自动生成相对应的路由,访问 /demo 路由。即可看到页面
npx umi g page class/index
page 目录下生成 class 文件夹 / index.js 和 index.css。.umirc.js 会自动生成相对应的路由,访问 /class/index 路由。即可看到页面
手动生成的文件,.umirc.js 文件中不会生成相对应的路由
获取路由中的参数
该文件必须以 $ 开头命名,这时 .umi 文件夹下的 router.js 文件会生成对应的路由
umi2 --> umi3
$ yarn create @umijs/umi-app
$ yarn install
使用dva
在 umi 项目中,你可以使用 dva 来处理数据流,以响应一些复杂的交互操作。
在 umi2 中要使用 dva 的功能很简单,只要使用 umi-plugin-react 插件并配置 dva:true 即可。
修改配置的文件:./umirc.js
// ref: https://umijs.org/config/
export default {
  plugins: [
    // ref: https://umijs.org/plugin/umi-plugin-react.html
    ['umi-plugin-react', {
      antd: true,
      dva: true, // 在此处启用 dva
      dynamicImport: false,
      title: 'hero',
      dll: false,
      routes: {
        exclude: [],
      },
      hardSource: false,
    }],
  ],
}
在dva中,处理数据流的文件统一放在 models 文件夹下,每一个文件默认导出一个对象,里面包含数据和处理数据的方法,通常我们称之为 model 。如以下count.js,model结构一般是如此:
./src/models/count.js
export default {
  namespace: 'count', // 默认与文件名相同
  state: 'count',
  subscriptions: {
    setup({ dispatch, history }) {
    },
  },
  // 同步
  reducers: {
    update(state) {
      return `${state}_count`;
    },
  },
  // 异步
  effects: {
    *fetch({ payload }, { call, put }) {
        yield put({
            type: 'update',
            payload
        })
    },
  },
}
在项目页面中使用model
我们需要导入connect将页面和model绑定在一起。
import { connect } from 'dva';
function CountPage(props) {
 //从props属性中打印namespace为count的model的state数据
  console.log(props.count);
  return (
    <div className={styles.normal}>
      <h1>数量大小</h1>
      <h2>This is {props.count}</h2>
    </div>
  );
}
export default connect(({ count }) => ({ count }))(CountPage);
如果使用es7的装饰器,我们可以改成这样的写法:
import { connect } from 'dva';
// 装饰器
@connect(({ count }) => ({ count }))
function CountPage(props) {
 // 从 props 属性中打印 namespace 为 count 的 model 的 state 数据
  console.log(props.count);
  return (
    <div className={styles.normal}>
      <h1>数量大小</h1>
      <h2>This is {props.count}</h2>
    </div>
  );
}
export default CountPage;
mock 文件夹
一般的文件格式如下,umi 的 mock 是对 express 的封装
export default {
    'GET /api/getLists': {
        lists: ['a', 'b', 'c']
    },
    'GET /api/getListsAsync': (req, res) => {
        console.log(req)
        res.json({
            lists: Array(10).fill(req, query.value)
        })
    }
}
src / services 文件夹
请求有关的处理文件
export function getLists(value) {
    return fetch('/api/getLists?value=' + value)
        .then(res => res.json())
    	.catch(err => {
			console.log(err)
    	})
}
上述内容其实在真实的项目开发当中所用不多,使用 umi 框架开发项目的方式,与 react 几乎无异。既然如何那为何要学?识万卷书,行万里路。见得东西越多,越能明白自己的不足之处。
下面是笔者开发项目架构,各位可以做个参考

源代码存放在 gitee 中
================================================================
来更新啦啦啦啦啦
================================================================
可以自定义 CLI,以后使用起来更加方便快捷。
啊,生活已经很累了,为啥你还要折磨我

我重复造轮子不就行了吗?(骂骂咧咧中~~~~~)啊,那随你吧

PS:
1.npm link或者npm其他情况下如果报错,请使用管理员权限,加个sudo
2. 请在github上创建一个组织,加入进去,在组织中放入自己的代码(不要问为啥,问就是我不想继续探索了,我饿了,找了一个最简单的办法写完,我想去吃饭)
如何在 github 上创建组织
PS:github 容易抽风
需要实现哪些基本功能:
- 通过
sumi create <name>命令启动项目 - 询问用户需要下载的模板
- 远程拉取模板
1. 创建项目
目录结构
s-umi-cli
├─ bin
│  └─ cli.js  # 启动文件
├─ README.md
└─ package.json
配置脚手架启动文件
{
  "name": "s-umi-cli",
  "version": "1.0.0",
  "description": "umi cli",
  "main": "index.js",
  "bin": {
    "sumi": "./bin/cli.js" // 配置启动文件路径,sumi 为别名
  },
  "scripts": {
    "test": "echo \"Error: no test specified\" && exit 1"
  },
  "author": [],
  "license": "MIT"
}
cli.js
#! /usr/bin/env node

console.log('~~~~~~~')
为了方便开发调试,使用 npm link 链接到全局
npm link
如果报错,请加上 sudo
终端输入
sumi
就可以看见 console.log 中的内容
2. 创建脚手架启动命令
借助 commander 依赖去实现这个需求
2.1 安装依赖
npm install commander --save
2.2 创建命令
cli.js
#! /usr/bin/env node

const program = require('commander')

program
  // 定义命令和参数
  .command('create <app-name>')
  .description('create a new project')
  // -f or --force 为强制创建,如果创建的目录存在则直接覆盖
  .option('-f, --force', 'overwrite target directory if it exist')
  .action((name, options) => {
    // 打印执行结果
    console.log('name:',name,'options:',options)
  })

program
   // 配置版本号信息
  .version(`v${require('../package.json').version}`)
  .usage('<command> [option]')

// 解析用户执行命令传入参数
program.parse(process.argv);
中端输入 sumi
sumi
Usage: sumi <command> [option]

Options:
  -V, --version                output the version number
  -h, --help                   display help for command

Commands:
  create [options] <app-name>  create a new project
  help [command]               display help for command
我们可以看到 Commands 下面已经有了 create [options] <app-name>,接着执行一下这个命令
sumi create
error: missing required argument 'app-name'

sumi create my-project
执行结果 >>> name: my-project options: {}

sumi create my-project -f
执行结果 >>> name: my-project options: { force: true }

sumi create my-project --force
执行结果 >>> name: my-project options: { force: true }
成功拿到命令行输入信息
2.3 执行命令
创建 lib 文件夹并在文件夹下创建 create.js
// lib/create.js

module.exports = async function (name, options) {
  // 验证是否正常取到值
  console.log('>>> create.js', name, options)
}
在 cli.js 中使用 create.js
// bin/cli.js

......
program
  .command('create <app-name>')
  .description('create a new project')
  .option('-f, --force', 'overwrite target directory if it exist') // 是否强制创建,当文件夹已经存在
  .action((name, options) => {
    // 在 create.js 中执行创建任务
    require('../lib/create.js')(name, options)
  })
......
执行一下 sumi create my-project,此时在 create.js 正常打印了我们出入的信息
sumi create my-project
>>> create.js
my-project {}
在创建目录的时候,需要判断是否已经存在
如果存在
当 { force: true } 时,直接移除原来的目录,直接创建
当 { force: false } 时 询问用户是否需要覆盖
如果不存在,直接创建
这里用到了 fs 的扩展工具 fs-extra,先来安装一下
fs-extra 是对 fs 模块的扩展,支持 promise
npm install fs-extra --save
接着完善一下 create.js 内部的实现逻辑
// lib/create.js

const path = require('path')
const fs = require('fs-extra')

module.exports = async function (name, options) {
  // 执行创建命令

  // 当前命令行选择的目录
  const cwd  = process.cwd();
  // 需要创建的目录地址
  const targetAir  = path.join(cwd, name)

  // 目录是否已经存在?
  if (fs.existsSync(targetAir)) {

    // 是否为强制创建?
    if (options.force) {
      await fs.remove(targetAir)
    } else {
      // 询问用户是否确定要覆盖
    }
  }
}
询问部分的逻辑,我们将在下文继续完善
2.4 创建更多命令
如果想添加其他命令也是同样的处理方式
// bin/cli.js

// 配置 config 命令
program
  .command('config [value]')
  .description('inspect and modify the config')
  .option('-g, --get <path>', 'get value from option')
  .option('-s, --set <path> <value>')
  .option('-d, --delete <path>', 'delete option from config')
  .action((value, options) => {
    console.log(value, options)
  })

// 配置 ui 命令
program
  .command('ui')
  .description('start add open roc-cli ui')
  .option('-p, --port <port>', 'Port used for the UI Server')
  .action((option) => {
    console.log(option)
  })
2.5 完善帮助信息
可以看一下 vue-cli 执行 --help 打印的信息
对比 sumi --help 打印的结果,结尾处少了一条说明信息,这里我们做补充,重点需要注意说明信息是带有颜色的,这里就需要用到我们工具库里面的 chalk 来处理
// bin/cli.js

program
  // 监听 --help 执行
  .on('--help', () => {
    // 新增说明信息
    console.log(`\r\nRun ${chalk.cyan(`sumi <command> --help`)} for detailed usage of given command\r\n`)
  })
2.6 打印个 Logo
给脚手架来一个 Logo,使用工具库里的 figlet
// bin/cli.js

program
  .on('--help', () => {
    // 使用 figlet 绘制 Logo
    console.log('\r\n' + figlet.textSync('sumi', {
      font: 'Ghost',
      horizontalLayout: 'default',
      verticalLayout: 'default',
      width: 80,
      whitespaceBreak: true
    }));
    // 新增说明信息
    console.log(`\r\nRun ${chalk.cyan(`sumi <command> --help`)} show details\r\n`)
  })
3. 询问用户问题获取创建所需信息
使用 inquirer 解决命令行交互的问题
上一步遗留:询问用户是否覆盖已存在的目录
- 用户选择模板
- 用户选择版本
- 获取下载模板的链接
3.1 询问是否覆盖已存在的目录
这里解决上一步遗留的问题:
如果目录已存在
当 { force: false } 时 询问用户是否需要覆盖
逻辑实际上已经完成,这里补充一下询问的内容
安装 inquirer
npm install inquirer --save
然后询问用户是否进行 Overwrite
// lib/create.js

const path = require('path')

// fs-extra 是对 fs 模块的扩展,支持 promise 语法
const fs = require('fs-extra')
const inquirer = require('inquirer')

module.exports = async function (name, options) {
  // 执行创建命令

  // 当前命令行选择的目录
  const cwd  = process.cwd();
  // 需要创建的目录地址
  const targetAir  = path.join(cwd, name)

  // 目录是否已经存在?
  if (fs.existsSync(targetAir)) {

    // 是否为强制创建?
    if (options.force) {
      await fs.remove(targetAir)
    } else {

      // 询问用户是否确定要覆盖
      let { action } = await inquirer.prompt([
        {
          name: 'action',
          type: 'list',
          message: 'Target directory already exists Pick an action:',
          choices: [
            {
              name: 'Overwrite',
              value: 'overwrite'
            },{
              name: 'Cancel',
              value: false
            }
          ]
        }
      ])

      if (!action) {
        return;
      } else if (action === 'overwrite') {
        // 移除已存在的目录
        console.log(`\r\nRemoving...`)
        await fs.remove(targetAir)
      }
    }
  }
}
github 提供了 api 接口来获取信息
api.github.com/orgs/ 接口获取模板信息
api.github.com/repos/ 接口获取版本信息
我们在 lib 目录下创建一个 http.js 专门处理模板和版本信息的获取
// lib/http.js

// 通过 axios 处理请求
const axios = require('axios')

axios.interceptors.response.use(res => {
  return res.data;
})


/**
 * 获取模板列表
 * @returns Promise
 */
async function getRepoList() {
  return axios.get('https://api.github.com/orgs/zhurong-cli/repos')
}

/**
 * 获取版本信息
 * @param {string} repo 模板名称
 * @returns Promise
 */
async function  getTagList(repo) {
  return axios.get(`https://api.github.com/repos/zhurong-cli/${repo}/tags`)
}

module.exports = {
  getRepoList,
  getTagList
}
3.3 用户选择模板
我们专门新建一个 Generator.js 来处理项目创建逻辑
// lib/Generator.js

class Generator {
  constructor (name, targetDir){
    // 目录名称
    this.name = name;
    // 创建位置
    this.targetDir = targetDir;
  }

  // 核心创建逻辑
  create(){

  }
}

module.exports = Generator;
在 create.js 中引入 Generator 类
// lib/create.js

...
const Generator = require('./Generator')

module.exports = async function (name, options) {
  // 执行创建命令

  // 当前命令行选择的目录
  const cwd  = process.cwd();
  // 需要创建的目录地址
  const targetAir  = path.join(cwd, name)

  // 目录是否已经存在?
  if (fs.existsSync(targetAir)) {
    ...
  }

  // 创建项目
  const generator = new Generator(name, targetAir);

  // 开始创建项目
  generator.create()
}
询问用户选择模版的逻辑
// lib/Generator.js

const { getRepoList } = require('./http')
const ora = require('ora')
const inquirer = require('inquirer')

// 添加加载动画
async function wrapLoading(fn, message, ...args) {
  // 使用 ora 初始化,传入提示信息 message
  const spinner = ora(message);
  // 开始加载动画
  spinner.start();

  try {
    // 执行传入方法 fn
    const result = await fn(...args);
    // 状态为修改为成功
    spinner.succeed();
    return result;
  } catch (error) {
    // 状态为修改为失败
    spinner.fail('Request failed, refetch ...')
  }
}

class Generator {
  constructor (name, targetDir){
    // 目录名称
    this.name = name;
    // 创建位置
    this.targetDir = targetDir;
  }

  // 获取用户选择的模板
  // 1)从远程拉取模板数据
  // 2)用户选择自己新下载的模板名称
  // 3)return 用户选择的名称

  async getRepo() {
    // 1)从远程拉取模板数据
    const repoList = await wrapLoading(getRepoList, 'waiting fetch template');
    if (!repoList) return;

    // 过滤我们需要的模板名称
    const repos = repoList.map(item => item.name);

    // 2)用户选择自己新下载的模板名称
    const { repo } = await inquirer.prompt({
      name: 'repo',
      type: 'list',
      choices: repos,
      message: 'Please choose a template to create project'
    })

    // 3)return 用户选择的名称
    return repo;
  }

  // 核心创建逻辑
  // 1)获取模板名称
  // 2)获取 tag 名称
  // 3)下载模板到模板目录
  async create(){

    // 1)获取模板名称
    const repo = await this.getRepo()

    console.log('用户选择了,repo=' + repo)
  }
}

module.exports = Generator;
此时,成功拿到模板名称 repo 的结果 ✌️
3.4 用户选择版本
过程和 3.3 一样
// lib/generator.js

const { getRepoList, getTagList } = require('./http')
...

// 添加加载动画
async function wrapLoading(fn, message, ...args) {
  ...
}

class Generator {
  constructor (name, targetDir){
    // 目录名称
    this.name = name;
    // 创建位置
    this.targetDir = targetDir;
  }

  // 获取用户选择的模板
  // 1)从远程拉取模板数据
  // 2)用户选择自己新下载的模板名称
  // 3)return 用户选择的名称

  async getRepo() {
    ...
  }

  // 获取用户选择的版本
  // 1)基于 repo 结果,远程拉取对应的 tag 列表
  // 2)用户选择自己需要下载的 tag
  // 3)return 用户选择的 tag

  async getTag(repo) {
    // 1)基于 repo 结果,远程拉取对应的 tag 列表
    const tags = await wrapLoading(getTagList, 'waiting fetch tag', repo);
    if (!tags) return;

    // 过滤我们需要的 tag 名称
    const tagsList = tags.map(item => item.name);

    // 2)用户选择自己需要下载的 tag
    const { tag } = await inquirer.prompt({
      name: 'tag',
      type: 'list',
      choices: tagsList,
      message: 'Place choose a tag to create project'
    })

    // 3)return 用户选择的 tag
    return tag
  }

  // 核心创建逻辑
  // 1)获取模板名称
  // 2)获取 tag 名称
  // 3)下载模板到模板目录
  async create(){

    // 1)获取模板名称
    const repo = await this.getRepo()

    // 2) 获取 tag 名称
    const tag = await this.getTag(repo)

    console.log('用户选择了,repo=' + repo + ',tag='+ tag)
  }
}

module.exports = Generator;
到此询问的工作就结束了,可以进行模板下载了
4. 下载远程模板
下载远程模版需要使用 download-git-repo 工具包,但它是不支持 promise的,所以我们这里需要使用 util 模块中的 promisify 方法对其进行 promise 化。
4.1 安装依赖与 promise 化
npm install download-git-repo --save
进行 promise 化处理
// lib/Generator.js

...
const util = require('util')
const downloadGitRepo = require('download-git-repo') // 不支持 Promise

class Generator {
  constructor (name, targetDir){
    ...

    // 对 download-git-repo 进行 promise 化改造
    this.downloadGitRepo = util.promisify(downloadGitRepo);
  }

  ...
}
4.2 核心下载功能
接着,就是模板下载部分的逻辑了
// lib/Generator.js

...
const util = require('util')
const path = require('path')
const downloadGitRepo = require('download-git-repo') // 不支持 Promise

// 添加加载动画
async function wrapLoading(fn, message, ...args) {
  ...
}

class Generator {
  constructor (name, targetDir){
    ...

    // 对 download-git-repo 进行 promise 化改造
    this.downloadGitRepo = util.promisify(downloadGitRepo);
  }
  ...

  // 下载远程模板
  // 1)拼接下载地址
  // 2)调用下载方法
  async download(repo, tag){

    // 1)拼接下载地址
    const requestUrl = `zhurong-cli/${repo}${tag?'#'+tag:''}`;

    // 2)调用下载方法
    await wrapLoading(
      this.downloadGitRepo, // 远程下载方法
      'waiting download template', // 加载提示信息
      requestUrl, // 参数1: 下载地址
      path.resolve(process.cwd(), this.targetDir)) // 参数2: 创建位置
  }

  // 核心创建逻辑
  // 1)获取模板名称
  // 2)获取 tag 名称
  // 3)下载模板到模板目录
  // 4)模板使用提示
  async create(){

    // 1)获取模板名称
    const repo = await this.getRepo()

    // 2) 获取 tag 名称
    const tag = await this.getTag(repo)

    // 3)下载模板到模板目录
    await this.download(repo, tag)

    // 4)模板使用提示
    console.log(`\r\nSuccessfully created project ${chalk.cyan(this.name)}`)
    console.log(`\r\n  cd ${chalk.cyan(this.name)}`)
    console.log('  npm run dev\r\n')
  }
}

module.exports = Generator;
完成这块,一个简单的脚手架就完成了
来试一下效果如何,执行 sumi create my-project
这个时候,我们就可以看到模板就已经创建好了
s-umi-cli
├─ bin
│  └─ cli.js
├─ lib
│  ├─ Generator.js
│  ├─ create.js
│  └─ http.js
├─ my-project .............. 我们创建的项目
│  ├─ public
│  │  ├─ favicon.ico
│  │  └─ index.html
│  ├─ src
│  │  ├─ assets
│  │  │  └─ logo.png
│  │  ├─ components
│  │  │  └─ HelloWorld.vue
│  │  ├─ App.vue
│  │  └─ main.js
│  ├─ README.md
│  ├─ babel.config.js
│  └─ package.json
├─ README.md
├─ package-lock.json
└─ package.json
5. 发布项目
上面都是在本地测试,实际在使用的时候,可能就需要发布到 npm 仓库,通过 npm 全局安装之后,直接到目标目录下面去创建项目,如何发布呢?
第一步,在 git 上建好仓库
第二步,完善 package.json 中的配置
{
  "name": "zhurong-cli",
  "version": "1.0.4",
  "description": "",
  "main": "index.js",
  "bin": {
    "zr": "./bin/cli.js"
  },
  "scripts": {
    "test": "echo \"Error: no test specified\" && exit 1"
  },
  "files": [
    "bin",
    "lib"
  ],
  "author": {
    "name": "T-Roc",
    "email": "lxp_work@163.com"
  },
  "keywords": [
    "zhurong-cli",
    "zr",
    "脚手架"
  ],
  "license": "MIT",
  "dependencies": {
    "axios": "^0.21.1",
    "chalk": "^4.1.1",
    "commander": "^7.2.0",
    "download-git-repo": "^3.0.2",
    "figlet": "^1.5.0",
    "fs-extra": "^10.0.0",
    "inquirer": "^8.0.0",
    "ora": "^5.4.0"
  }
}
第三步,使用 npm publish 进行发布,更新到时候,注意修改版本号
这样就发布成功了,我们打开 npm 网站搜索一下 🔍
已经可以找到它了,这样我们就可以通过 npm 或者 yarn 全局安装使用了。
关注公众号:大明贵妇,获取 Umi.js 学习资料(回复 Umi ),期待各位客官来临

参考文章:https://www.jianshu.com/p/dc493809a2fd