用Python实现的这五个小游戏,你真的学会了嘛?
相关文件
源码分享,问题解答!!
关注小编,私信小编领取哟!
当然别忘了一件三连哟~~
对了大家可以关注小编的公众号哟~~
有很多资源可以领取的哟!!
Python日志
游戏名称
- 五子棋
- 雷霆战机
- 贪吃蛇
- 坦克大战
- 俄罗斯方块
开发环境
Python版本:3.6.4
相关模块:
pygame模块;
以及一些Python自带的模块。
环境搭建
安装Python并添加到环境变量,pip安装需要的相关模块即可。
一:五子棋
五子棋是是一种两人对弈的纯策略型棋类游戏。
五子棋有两种玩法。玩法一:双方分别使用黑白两色的棋子,下在棋盘直线与横线的交叉点上,先形成五子连线者获胜。玩法二:自己形成五子连线就替换对方任意一枚棋子。被替换的棋子可以和对方交换棋子。最后以先出完所有棋子的一方为胜。
pygame模块
游戏采用pygame模块需要先安装
pip install pygame
窗口启动
import pygame

pygame.init()
pygame.display.set_caption('五子棋-IT入门') # 改标题
# pygame.display.set_mode()表示建立个窗口,左上角为坐标原点,往右为x正向,往下为y轴正向
screen = pygame.display.set_mode((640,640))
绘制棋子
需要说一下的是画棋子,因为没找到什么合适的棋子图片,所以只要自己来画棋子。
我们用pygame.draw.circle
绘制棋盘
定义棋盘这个类
class RenjuBoard(object):

    def __init__(self):
        # self._board = board = [[EMPTY] * 15 for _ in range(15)]
        # 将棋盘每一个交叉点都看作列表的一个元素位,一共有15*15共225个元素
        self._board = [[]] * 15
        self.reset()
    #重置棋盘
    def reset(self):
        for row in range(len(self._board)):
            self._board[row] = [EMPTY] * 15
    #定义棋盘上的下棋函数,row表示行,col表示列,is_black表示判断当前点位该下黑棋,还是白棋
    def move(self, row, col, is_black):
        if self._board[row][col] == EMPTY:
            self._board[row][col] = BLACK if is_black else WHITE
            return True
        return False
    # 给棋盘定义一个函数将自己在screen上面画出来,使用pygame.draw()函数。并且顺便将下了的棋子也画出来
    def draw(self, screen):
        for h in range(1, 16):
            pygame.draw.line(screen, black_color,
                             [40, h * 40], [600, h * 40], 1)
            pygame.draw.line(screen, black_color,
                             [h * 40,40], [h * 40, 600], 1)
        # 给棋盘加一个外框,使美观
        pygame.draw.rect(screen, black_color, [36, 36, 568, 568], 3)

        # 在棋盘上标出,天元以及另外4个特殊点位
        pygame.draw.circle(screen, black_color, [320, 320], 5, 0)
        pygame.draw.circle(screen, black_color, [160, 160], 3, 0)
        pygame.draw.circle(screen, black_color, [160, 480], 3, 0)
        pygame.draw.circle(screen, black_color, [480, 160], 3, 0)
        pygame.draw.circle(screen, black_color, [480, 480], 3, 0)
        #做2次for循环取得棋盘上所有交叉点的坐标
        for row in range(len(self._board)):
            for col in range(len(self._board[row])):
                # 将下在棋盘上的棋子画出来
                if self._board[row][col] != EMPTY:
                    ccolor = black_color \
                        if self._board[row][col] == BLACK else white_color
                    # 取得这个交叉点下的棋子的颜色,并将棋子画出来
                    pos = [40 * (col + 1), 40 * (row + 1)]
                    # 画出棋子
                    pygame.draw.circle(screen, ccolor, pos, 18, 0)
最后就是代码的实现啦,代码有点长我就不一一写出来啦,需要的小伙伴可以看相关文件哟!!
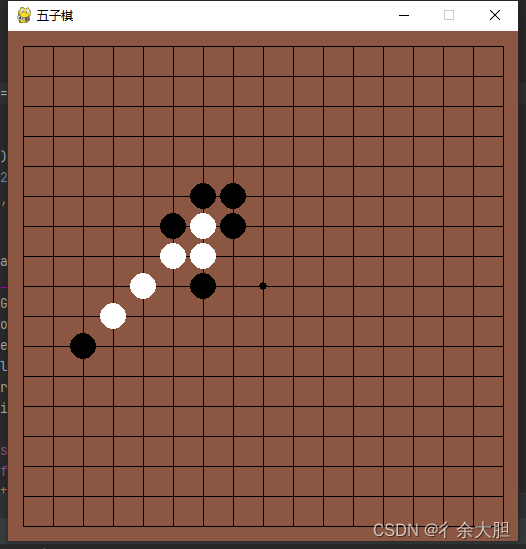
效果展示
二:雷霆战机
敌人精灵
首先定义Mob(小怪物)类型:
class Mob(pygame.sprite.Sprite):
    def __init__(self):
        pygame.sprite.Sprite.__init__(self)
        self.image = pygame.Surface((30, 40))
        self.image.fill(RED)
        self.rect = self.image.get_rect()
        self.rect.x = random.randrange(WIDTH - self.rect.width)
        self.rect.y = random.randrange(-100, -40)
        self.speedy = random.randrange(1, 8)
这里的关键是为小怪物初始化一个好的位置。选择一个高于顶部的值(y <0)和一个介于左右两边之间的x的随机值。
在update函数中,更新精灵y轴的坐标,向下移动精灵;精灵离开底部时,通过将精灵移回顶部上方的随机位置来制造下一个精灵。
def update(self):
        self.rect.y += self.speedy
        if self.rect.top > HEIGHT + 10:
            self.rect.x = random.randrange(WIDTH - self.rect.width)
            self.rect.y = random.randrange(-100, -40)
            self.speedy = random.randrange(1, 8)
一群敌机
使用for语句,循环创建一些怪物,并将它们添加到精灵组中:
player = Player()
all_sprites.add(player)
for i in range(8):
    m = Mob()
    all_sprites.add(m)
    mobs.add(m)
这很棒,但让小怪直接向下移动有点无聊。让在x方向上添加一点运动:
class Mob(pygame.sprite.Sprite):
    def __init__(self):
        pygame.sprite.Sprite.__init__(self)
        self.image = pygame.Surface((30, 40))
        self.image.fill(RED)
        self.rect = self.image.get_rect()
        self.rect.x = random.randrange(WIDTH - self.rect.width)
        self.rect.y = random.randrange(-100, -40)
        self.speedy = random.randrange(1, 8)
        self.speedx = random.randrange(-3, 3)

    def update(self):
        self.rect.x += self.speedx
        self.rect.y += self.speedy
        if self.rect.top > HEIGHT + 10 or self.rect.left < -25 or self.rect.right > WIDTH + 20:
            self.rect.x = random.randrange(WIDTH - self.rect.width)
            self.rect.y = random.randrange(-100, -40)
            self.speedy = random.randrange(1, 8)
效果实现
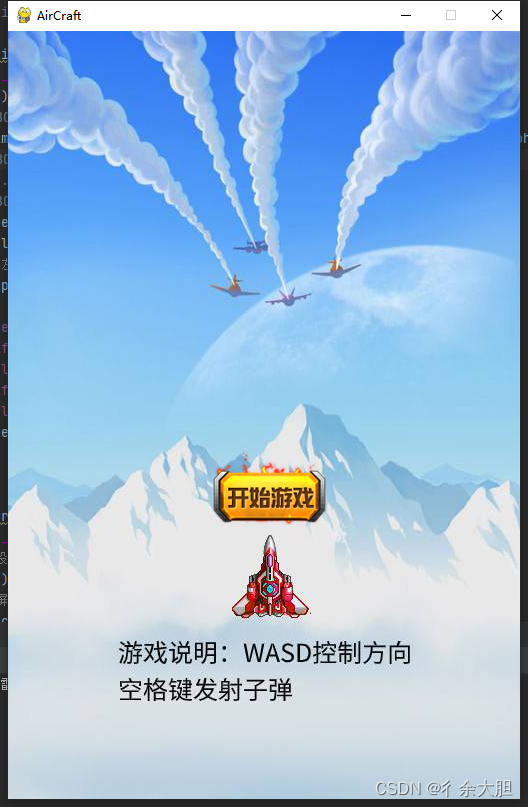
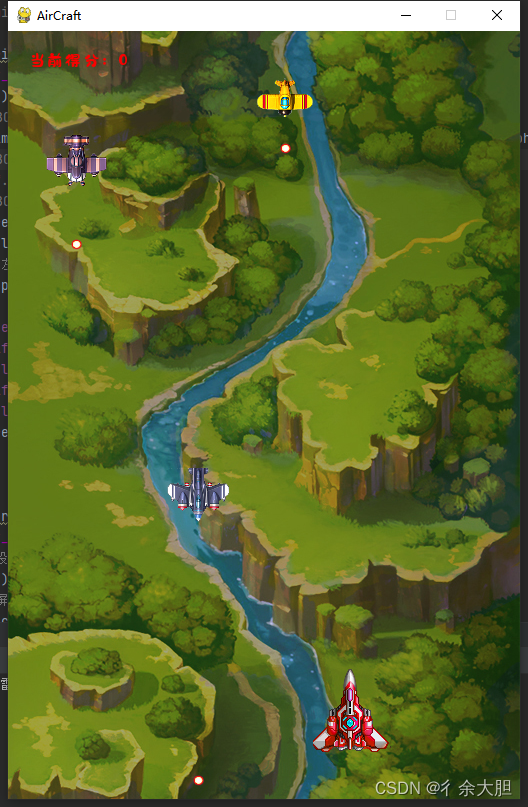
需要源码的小伙伴一样的可以看相关文件哈!!!!
三:贪吃蛇
原理介绍
贪吃蛇的游戏规则应该不需要我多做介绍了吧T_T。写个贪吃蛇游戏其实还是很简单的。首先,我们进行一下游戏初始化:
pygame.init()
screen = pygame.display.set_mode(cfg.SCREENSIZE)
clock = pygame.time.Clock()
然后定义一个贪吃蛇类:
'''贪吃蛇类'''
class Snake(pygame.sprite.Sprite):
  def __init__(self, cfg, **kwargs):
    pygame.sprite.Sprite.__init__(self)
    self.cfg = cfg
    self.head_coord = [random.randint(5, cfg.GAME_MATRIX_SIZE[0]-6), random.randint(5, cfg.GAME_MATRIX_SIZE[1]-6)]
    self.tail_coords = []
    for i in range(1, 3):
      self.tail_coords.append([self.head_coord[0]-i, self.head_coord[1]])
    self.direction = 'right'
    self.head_colors = [(0, 80, 255), (0, 255, 255)]
    self.tail_colors = [(0, 155, 0), (0, 255, 0)]
其中head_coord用来记录蛇头所在位置,而tail_coords是一个二维数组,用来记录所有蛇身的位置。一开始,贪吃蛇长为3,并且位置是随机生成的。用户通过↑↓←→键来控制贪吃蛇的行动:
# --按键检测
for event in pygame.event.get():
  if event.type == pygame.QUIT:
    pygame.quit()
    sys.exit()
  elif event.type == pygame.KEYDOWN:
    if event.key in [pygame.K_UP, pygame.K_DOWN, pygame.K_LEFT, pygame.K_RIGHT]:
      snake.setDirection({pygame.K_UP: 'up', pygame.K_DOWN: 'down', pygame.K_LEFT: 'left', pygame.K_RIGHT: 'right'}[event.key])
需要注意的是,贪吃蛇不能180°大拐弯,只能90°地拐弯。例如正在向左行动的贪吃蛇不能瞬间变成向右行动。具体而言,代码实现如下:
'''设置方向'''
def setDirection(self, direction):
  assert direction in ['up', 'down', 'right', 'left']
  if direction == 'up':
    if self.head_coord[1]-1 != self.tail_coords[0][1]:
      self.direction = direction
  elif direction == 'down':
    if self.head_coord[1]+1 != self.tail_coords[0][1]:
      self.direction = direction
  elif direction == 'left':
    if self.head_coord[0]-1 != self.tail_coords[0][0]:
      self.direction = direction
  elif direction == 'right':
    if self.head_coord[0]+1 != self.tail_coords[0][0]:
      self.direction = direction
然后,我们需要随机生成一个食物,且需要保证该食物的位置不与贪吃蛇的位置相同:
‘’‘食物类’’’
class Apple(pygame.sprite.Sprite):
  def __init__(self, cfg, snake_coords, **kwargs):
    pygame.sprite.Sprite.__init__(self)
    self.cfg = cfg
    while True:
      self.coord = [random.randint(0, cfg.GAME_MATRIX_SIZE[0]-1), random.randint(0, cfg.GAME_MATRIX_SIZE[1]-1)]
      if self.coord not in snake_coords:
        break
    self.color = (255, 0, 0)
  '''画到屏幕上'''
  def draw(self, screen):
    cx, cy = int((self.coord[0] + 0.5) * self.cfg.BLOCK_SIZE), int((self.coord[1] + 0.5) * self.cfg.BLOCK_SIZE)
    pygame.draw.circle(screen, self.color, (cx, cy), self.cfg.BLOCK_SIZE//2-2)
# 随机生成一个食物
apple = Apple(cfg, snake.coords)
在更新贪吃蛇的时候,如果它吃到了食物,则蛇身长加一,否则只是简单的按照给定的方向行动而不改变蛇身长度:
'''更新贪吃蛇'''
def update(self, apple):
  # 根据指定的方向运动
  self.tail_coords.insert(0, copy.deepcopy(self.head_coord))
  if self.direction == 'up':
    self.head_coord[1] -= 1
  elif self.direction == 'down':
    self.head_coord[1] += 1
  elif self.direction == 'left':
    self.head_coord[0] -= 1
  elif self.direction == 'right':
    self.head_coord[0] += 1
  # 判断是否吃到了食物
  if self.head_coord == apple.coord:
    return True
  else:
    self.tail_coords = self.tail_coords[:-1]
    return False
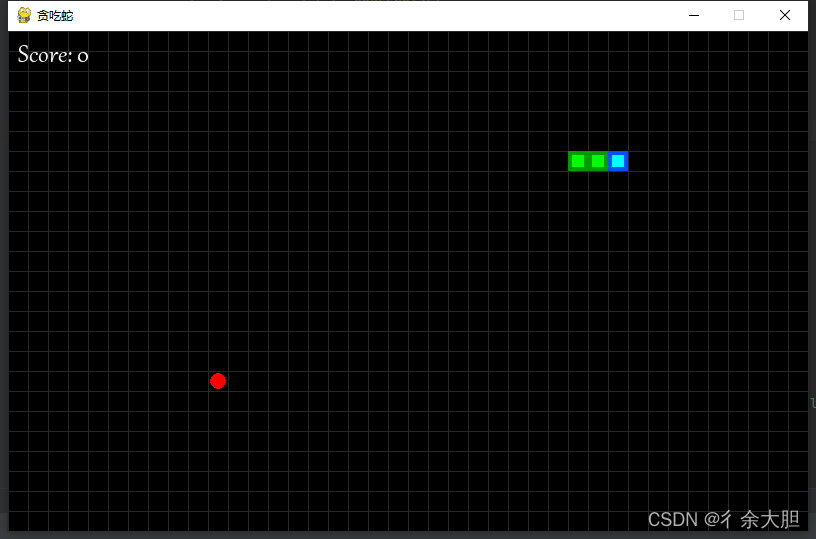
效果实现
视频教学:点击可以查看教学视频
四:坦克大战
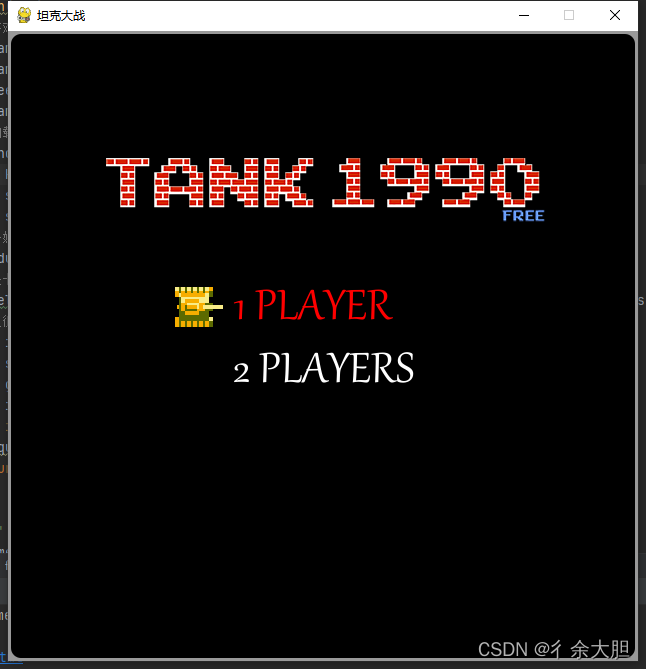
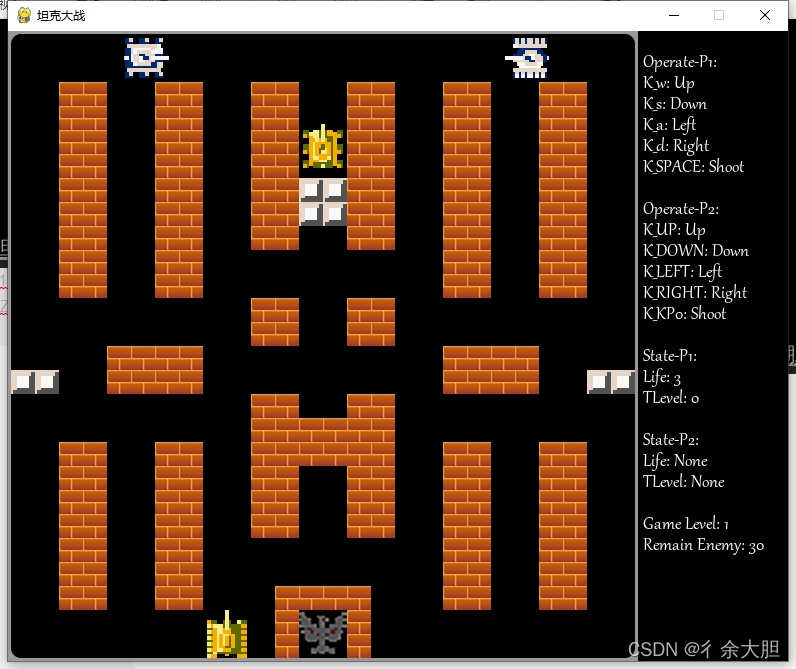
坦克大战这个游戏相信是一代人的回忆吧,话不多说,这次先上代码
依旧是老样子
我们先定义这次代码所需要的模块
import pygame
from pygame.locals import *
import math
import random
扩展战场
def expand_battle_field():
    for row in small_battle_field:
        new_row = []
        for column in row:
            new_row.extend([column] * 2)
        battle_field.append(new_row)
        battle_field.append(new_row[:])
定义区域
def area_conflict(area1, area2):
    for point1 in area1:
        if point1 in area2:
            return True
    return False
定义绘制战场
def draw_battle_field():
    global symbol_position
    global symbol_area
    for row_index in range(y_max):
        for column_index in range(x_max):
            if battle_field[row_index][column_index] == 1:
                # is a brick_wall
                screen.blit(brick_wall_img, (column_index * 30, row_index * 30))
            if battle_field[row_index][column_index] == 2:
                # is a cement_wall
                screen.blit(cement_wall_img, (column_index * 30, row_index * 30))
            if symbol_position != None:
                continue
            if battle_field[row_index][column_index] == 3:
                # is a symbol
                symbol_position = (column_index, row_index)
                symbol_area = (
                        (column_index, row_index),
                        (column_index + 1, row_index),
                        (column_index, row_index + 1),
                        (column_index + 1, row_index + 1))
    if game_over:
        screen.blit(symbol_destoryed_img, (symbol_position[0] * 30, symbol_position[1] * 30))
    else:
        screen.blit(symbol_img, (symbol_position[0] * 30, symbol_position[1] * 30))
时间
def produce_enemy(time):
    global last_product
    global enemys_cur_number
    if last_product != -1 and time - last_product < enemys_product_interval:
        return
    index_e = random.randint(0, 1)
    conflict = False
    for point in tank.area:
        if point in enemy_init_area[index_e]:
            conflict = True
            break

    if not conflict:
        for enemy in enemys:
            for point_e in enemy.area:
                if point_e in enemy_init_area[index_e]:
                    conflict = True
                    break
            if conflict:
                break;

    if not conflict:
        enemys.append(Enemy(enemy_init_position[index_e]))
        last_product = time
        enemys_cur_number += 1
        return

    for point in tank.area:
        if point in enemy_init_area[1 - index_e]:
            return

    for enemy in enemys:
        for point_e in enemy.area:
            if point_e in enemy_init_area[1 - index_e]:
                return

    enemys.append(Enemy(enemy_init_position[1 - index_e]))
    last_product = time
    enemys_cur_number += 1
效果实现
五:俄罗斯方块
相信大家都玩过俄罗斯方块吧,应该是小时候的回忆吧,但是想不想了解一下这个程序是怎么写出来的呢,自己写出来的应该玩起来更有感觉吧!
接下来,我就分享一下这个游戏的源码过程啊!
先用python创建一个py文件
定义这次程序所需要的类
import sys
import time
import pygame
from pygame.localsimport *
import blocks
然后写出它所需要的模块
SIZE =30 # 每个小方格大小
BLOCK_HEIGHT =25  # 游戏区高度
BLOCK_WIDTH =10  # 游戏区宽度
BORDER_WIDTH =4  # 游戏区边框宽度
BORDER_COLOR = (40, 40, 200)# 游戏区边框颜色
SCREEN_WIDTH = SIZE * (BLOCK_WIDTH +5)# 游戏屏幕的宽
SCREEN_HEIGHT = SIZE * BLOCK_HEIGHT# 游戏屏幕的高
BG_COLOR = (40, 40, 60)# 背景色
BLOCK_COLOR = (20, 128, 200)#
BLACK = (0, 0, 0)
RED = (200, 30, 30)# GAME OVER 的字体颜色
画已经落下的方块
def _draw_game_area(screen, game_area):
    if game_area:
        for i, row in enumerate(game_area):
            for j, cell in enumerate(row):
                if cell != '.':
                    pygame.draw.rect(screen, BLOCK_COLOR, (j * SIZE, i * SIZE, SIZE, SIZE), 0)
画单个方块
def _draw_block(screen, block, offset_x, offset_y, pos_x, pos_y):
    if block:
        for i in range(block.start_pos.Y, block.end_pos.Y + 1):
            for j in range(block.start_pos.X, block.end_pos.X + 1):
                if block.template[i][j] != '.':
                    pygame.draw.rect(screen, BLOCK_COLOR,
                                     (offset_x + (pos_x + j) * SIZE, offset_y + (pos_y + i) * SIZE, SIZE, SIZE), 0)
画得分等信息
def _draw_info(screen, font, pos_x, font_height, score):
    print_text(screen, font, pos_x, 10, f'得分: ')
    print_text(screen, font, pos_x, 10 + font_height + 6, f'{score}')
    print_text(screen, font, pos_x, 20 + (font_height + 6) * 2, f'速度: ')
    print_text(screen, font, pos_x, 20 + (font_height + 6) * 3, f'{score // 10000}')
    print_text(screen, font, pos_x, 30 + (font_height + 6) * 4, f'下一个:')


if __name__ == '__main__':
    main()
效果实现:
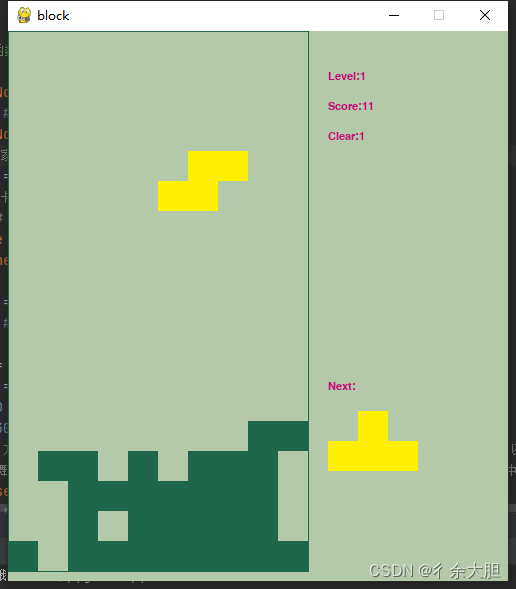
好啦,今天就的分享就到这里啦,需要源代码的小伙伴可以查看相关文件哟!
也可以关注小编的公众号获取源码和资源哟!!
公众号:Python日志

更多Python视频教学:Python视频教学