vite vue-quill 构建基本案例
示例图
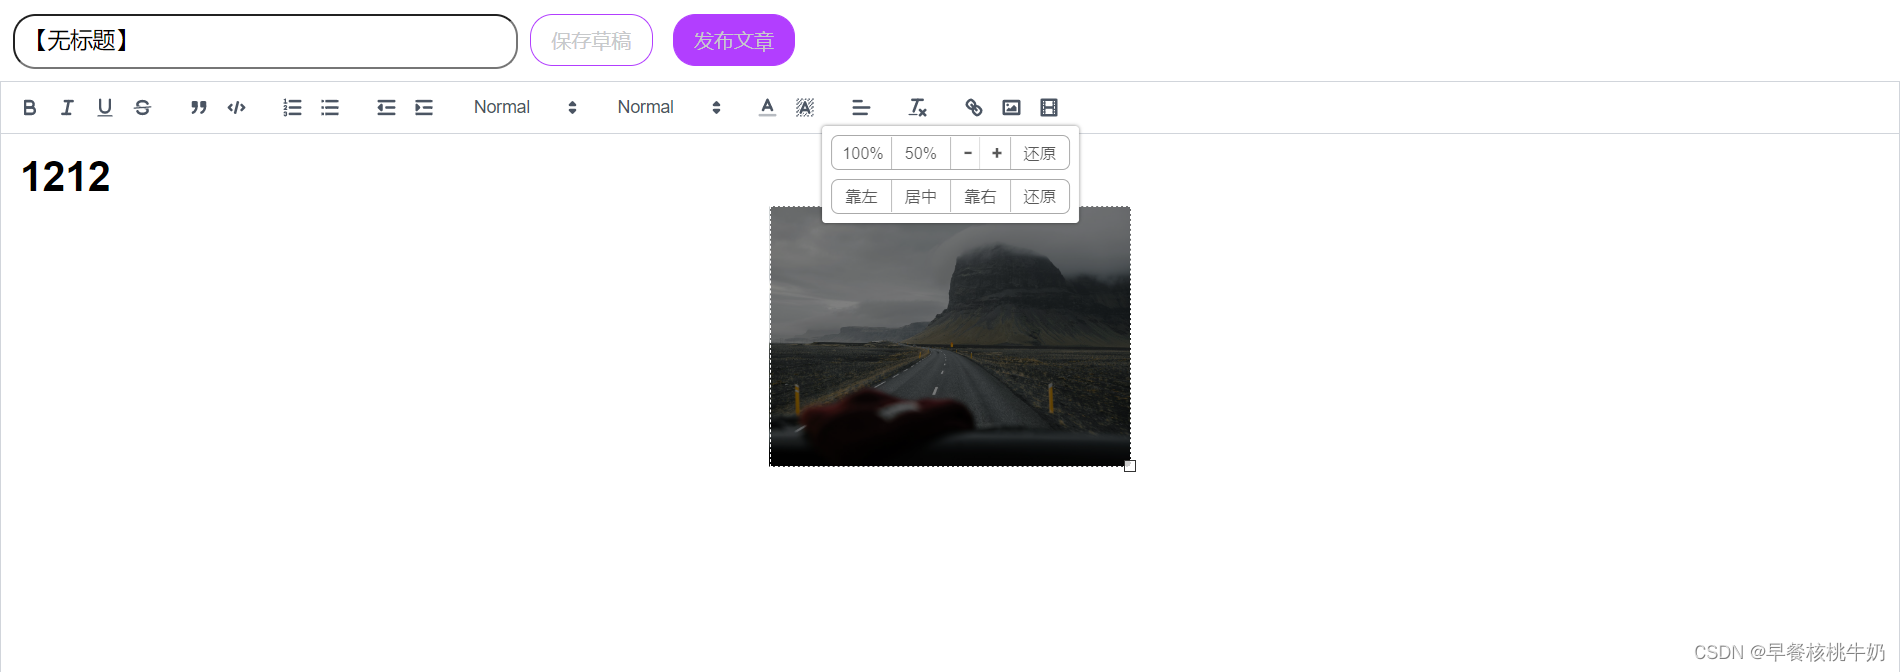
注意事项:如果没有使用后端接口时,插入图片的时候总是会插在最前面,使用了就不会了
Vue 前端
安装版本
  "dependencies": {
  	...
    "@ssumo/quill-resize-module": "^1.0.1",
    "@vueup/vue-quill": "^1.0.1",
     "quill-image-paste-module": "^1.0.6",
    ...
  },
安装Quill相关
> npm install @vueup/vue-quill@1.0.1
> npm install quill-image-paste-module@1.0.6
> npm install @ssumo/quill-resize-module@1.0.1
之所以使用 @vueup/vue-quill ,是因为使用 vue-quill-editor 老是有一堆报错
imports of undefined,undefined (reading 'register')之类的
参考文档
vue-quill 基本格式案例
https://blog.csdn.net/weixin_44892327/article/details/127625100
https://blog.csdn.net/qq_33674679/article/details/128128291
自定义上传图片到服务器、粘贴图片上传至服务器、拖拽图片上传至服务器的功能
https://www.npmjs.com/package/quill-image-paste-module
具体使用方法见参考文档,写的很详细了
main.js
import { createApp } from 'vue';
import App from './App.vue';

// 导入vue富文本编辑器
import { QuillEditor } from '@vueup/vue-quill'
import '@vueup/vue-quill/dist/vue-quill.snow.css'
import '@vueup/vue-quill/dist/vue-quill.bubble.css'

const app = createApp(App);
app.component('QuillEditor', QuillEditor)
app.mount("#app");
components/RichTextEditor.vue
<template>
  <div>
    <input v-model="title" class="title" type="text" />
    <input
      class="saveDraft"
      type="button"
      value="保存草稿"
      @click="saveDraft"
    />
    <input class="saveDiary" type="button" value="发布文章" />
    <quill-editor
      v-model:content="content"
      :options="editorOption"
      contentType="html"
      style="height: 600px"
    />
  </div>
</template>

<script>
import { QuillEditor, Quill } from "@vueup/vue-quill";

import { container, ImageExtend, QuillWatch } from "quill-image-paste-module";
Quill.register("modules/ImageExtend", ImageExtend);

import ResizeModule from "@ssumo/quill-resize-module";

Quill.register("modules/resize", ResizeModule);
// Quill.register("modules/ImageExtend", ImageExtend);

export default {
  // eslint-disable-next-line vue/multi-word-component-names
  name: "RichTextEditor",
  components: { QuillEditor },
  data() {
    return {
      title: "【无标题】",
      example: "test",
      content: "",
      // 富文本框参数设置
      // Rich text box parameter settings
      editorOption: {
        modules: {
          ImageExtend: {
            // 可选参数 是否显示上传进度和提示语
            // Optional parameters. Whether to display upload progress and prompt
            loading: true,
            // 图片参数名
            // Picture parameter name
            name: "img",
            // 可选参数 图片大小,单位为M,1M = 1024kb
            // Optional parameters. Image size, Unit is M
            size: 10,
            // 服务器地址, 如果action为空,则采用base64插入图片
            // Server address, if action is empty, use base64 to insert picture
            action: "/upload",
            // 可选 可上传的图片格式
            // Optional, uploadable image format
            accept:
              "image/jpg, image/png, image/gif, image/jpeg, image/bmp, image/x-icon",
            // response 为一个函数用来获取服务器返回的具体图片地址
            // response is a function to get the specific image address returned by the server
            // 例如服务器返回 {code: 200; data:{ url: 'baidu.com'}}
            // For example, the server returns {code: 200; data:{ url: 'baidu.com'}}
            // 则 return res.data.url
            response: (res) => {
              console.log(res);
              return res.data.url;
            },
            // 可选参数 设置请求头部
            // Optional parameter. Set request header
            headers: (xhr) => {
              // 比如添加 csrf-token
              // For example, add csrf-token
              xhr.setRequestHeader("X-CSRFToken", "TestToken");
            },
            // 图片超过大小的回调
            // Callback when the image exceeds the size
            sizeError: () => {
              alert("图片大小超过 10 M");
            },
            // 可选参数 自定义开始上传触发事件
            // Optional parameters. Custom start upload trigger event
            start: () => {},
            // 可选参数 自定义上传结束触发的事件,无论成功或者失败
            // Optional parameters. Customize the event triggered by the end of upload, regardless of success or failure
            end: () => {},
            // 可选参数 上传失败触发的事件
            // Optional parameter. The event triggered by upload failure
            error: () => {},
            // 可选参数  上传成功触发的事件
            // Optional parameter. The event triggered by a successful upload
            success: () => {},
            // 可选参数 选择图片触发,也可用来设置头部,但比headers多了一个参数,可设置formData
            // Optional parameters. Select the picture to trigger. It can also be used to set the header, but there is one more parameter than headers, which can be set formData
            change: (xhr, formData) => {
              formData.append("example", "test");
            },
          },
          resize: {
            locale: {
              altTip: "按住alt键比例缩放",
              inputTip: "回车键确认",
              floatLeft: "靠左",
              floatRight: "靠右",
              center: "居中",
              restore: "还原",
            },
          },
          toolbar: {
            // container为工具栏,此次引入了全部工具栏,也可自行配置
            // container is a toolbar, all toolbars are introduced this time, and they can also be configured by themselves

            // container: container,
            container: [
              ["bold", "italic", "underline", "strike"], // 加粗 斜体 下划线 删除线
              ["blockquote", "code-block"], // 引用  代码块
              [{ list: "ordered" }, { list: "bullet" }], // 有序、无序列表
              [{ indent: "-1" }, { indent: "+1" }], // 缩进
              [{ size: ["small", false, "large", "huge"] }], // 字体大小
              [{ header: [1, 2, 3, 4, 5, 6, false] }], // 标题
              [{ color: [] }, { background: [] }], // 字体颜色、字体背景颜色
              [{ align: [] }], // 对齐方式
              ["clean"], // 清除文本格式
              ["link", "image", "video", "docx"], // 链接、图片、视频、文档//重要
            ],
            handlers: {
              image: function () {
                // 劫持原来的图片点击按钮事件
                // Hijack the original picture click button event
                QuillWatch.emit(this.quill.id);
              },
            },
          },
        },
      },
    };
  },
  methods: {
    saveDraft() {
      console.log(this.content);
    },
  },
};
</script>

<style scoped>
.saveDraft {
  height: 41px;
  margin-right: 16px;
  padding: 0 16px;
  font-size: 16px;
  color: #c7c9cb;
  border: 1px solid rgb(178, 62, 255);
  border-radius: 18px;
  white-space: nowrap;
  background: none;
}
.saveDraft:hover {
  background-color: rgba(203, 203, 203, 20%);
}
.saveDiary {
  height: 41px;
  margin-right: 16px;
  padding: 0 16px;
  font-size: 16px;
  color: #c7c9cb;
  border: 1px solid rgb(178, 62, 255);
  border-radius: 18px;
  white-space: nowrap;
  background-color: rgb(178, 62, 255);
}
.saveDiary:hover {
  background-color: rgb(178, 62, 255, 70%);
}
.title {
  width: 20%;
  border-radius: 18px;
  padding: 8px;
  padding-right: 88px;
  font-size: 18px;
  line-height: 24px;
  background: none;
  margin: 10px;
}
/* ql开头表示富文本样式设计 */
.ql-toolbar.ql-snow {
  border: 1px solid #d1d5db;
  box-sizing: border-box;
  font-family: "Helvetica Neue", "Helvetica", "Arial", sans-serif;
  padding: 8px;
  background-color: rgb(178, 62, 255, 70%);
}
</style>
跨域请求相关
> npm install @vitejs/plugin-vue
vite.config.js
我是使用vite构建的项目,
使用VueCLI构建的,麻烦自行搜索方法
import { defineConfig } from 'vite'
import vue from '@vitejs/plugin-vue'

// https://vitejs.dev/config/
export default defineConfig({
  plugins: [vue(),],
  server: {
    proxy: {
      '/upload': {
        target: 'http://127.0.0.1:3000',
        changeOrigin: true,
      },
    }
  }
})
Node 后端
版本
  "dependencies": {
    "body-parser": "^1.20.1",
    "cors": "^2.8.5",
    "express-fileupload": "^1.4.0",
    "express.js": "^1.0.0",
    "nodemon": "^2.0.20"
  },
安装
> npm install body-parser@1.20.1
> npm install cors@2.8.5
> npm install express-fileupload@1.4.0
> npm install express.js@1.0.0
> npm install nodemon@2.0.20
后端 express 代码 server.js
const express = require('express');
const path = require('path');
// 跨域
const cors = require("cors");

// 上传文件
const fileupload = require('express-fileupload');
let initial_path = path.join(__dirname, "public");

// post请求解析
const bodyParser = require("body-parser");
// 解析以 application/json 和 application/x-www-form-urlencoded 提交的数据
var jsonParser = bodyParser.json();
var urlencodedParser = bodyParser.urlencoded({ extended: false });

const app = express();

app.use(express.static(initial_path));
app.use(fileupload());
// 跨域问题
app.use(cors());
app.use(urlencodedParser);
app.use(jsonParser)

// 开启 cors 不包含的跨域请求
app.use(function (req, res, next) {
    // 请求头部分
    res.header("Access-Control-Allow-Origin", "*");
    res.header("Access-Control-Allow-Headers", "Access-Control-Allow-Credentials", "Origin, X-Requested-With, Content-Type, Accept");

    // 定义了 next 表示会继续执行
    // 不写则到这里就停止了, 后面不会执行
    next();
});


// upload link
app.post('/upload', (req, res) => {
    let file = req.files.img;
    let date = new Date();
    // image name
    let imagename = date.getDate() + date.getTime() + file.name;
    // image upload path
    let path = 'public/uploads/' + imagename;

    // create upload
    file.mv(path, (err, result) => {
        if (err) {
            throw err;
        } else {
            // our image upload path
            res.json({
                data: {
                    url: `uploads/${imagename}`
                }
            })
        }
    })
})


app.listen("3000", () => {
    console.log('listening...')
})